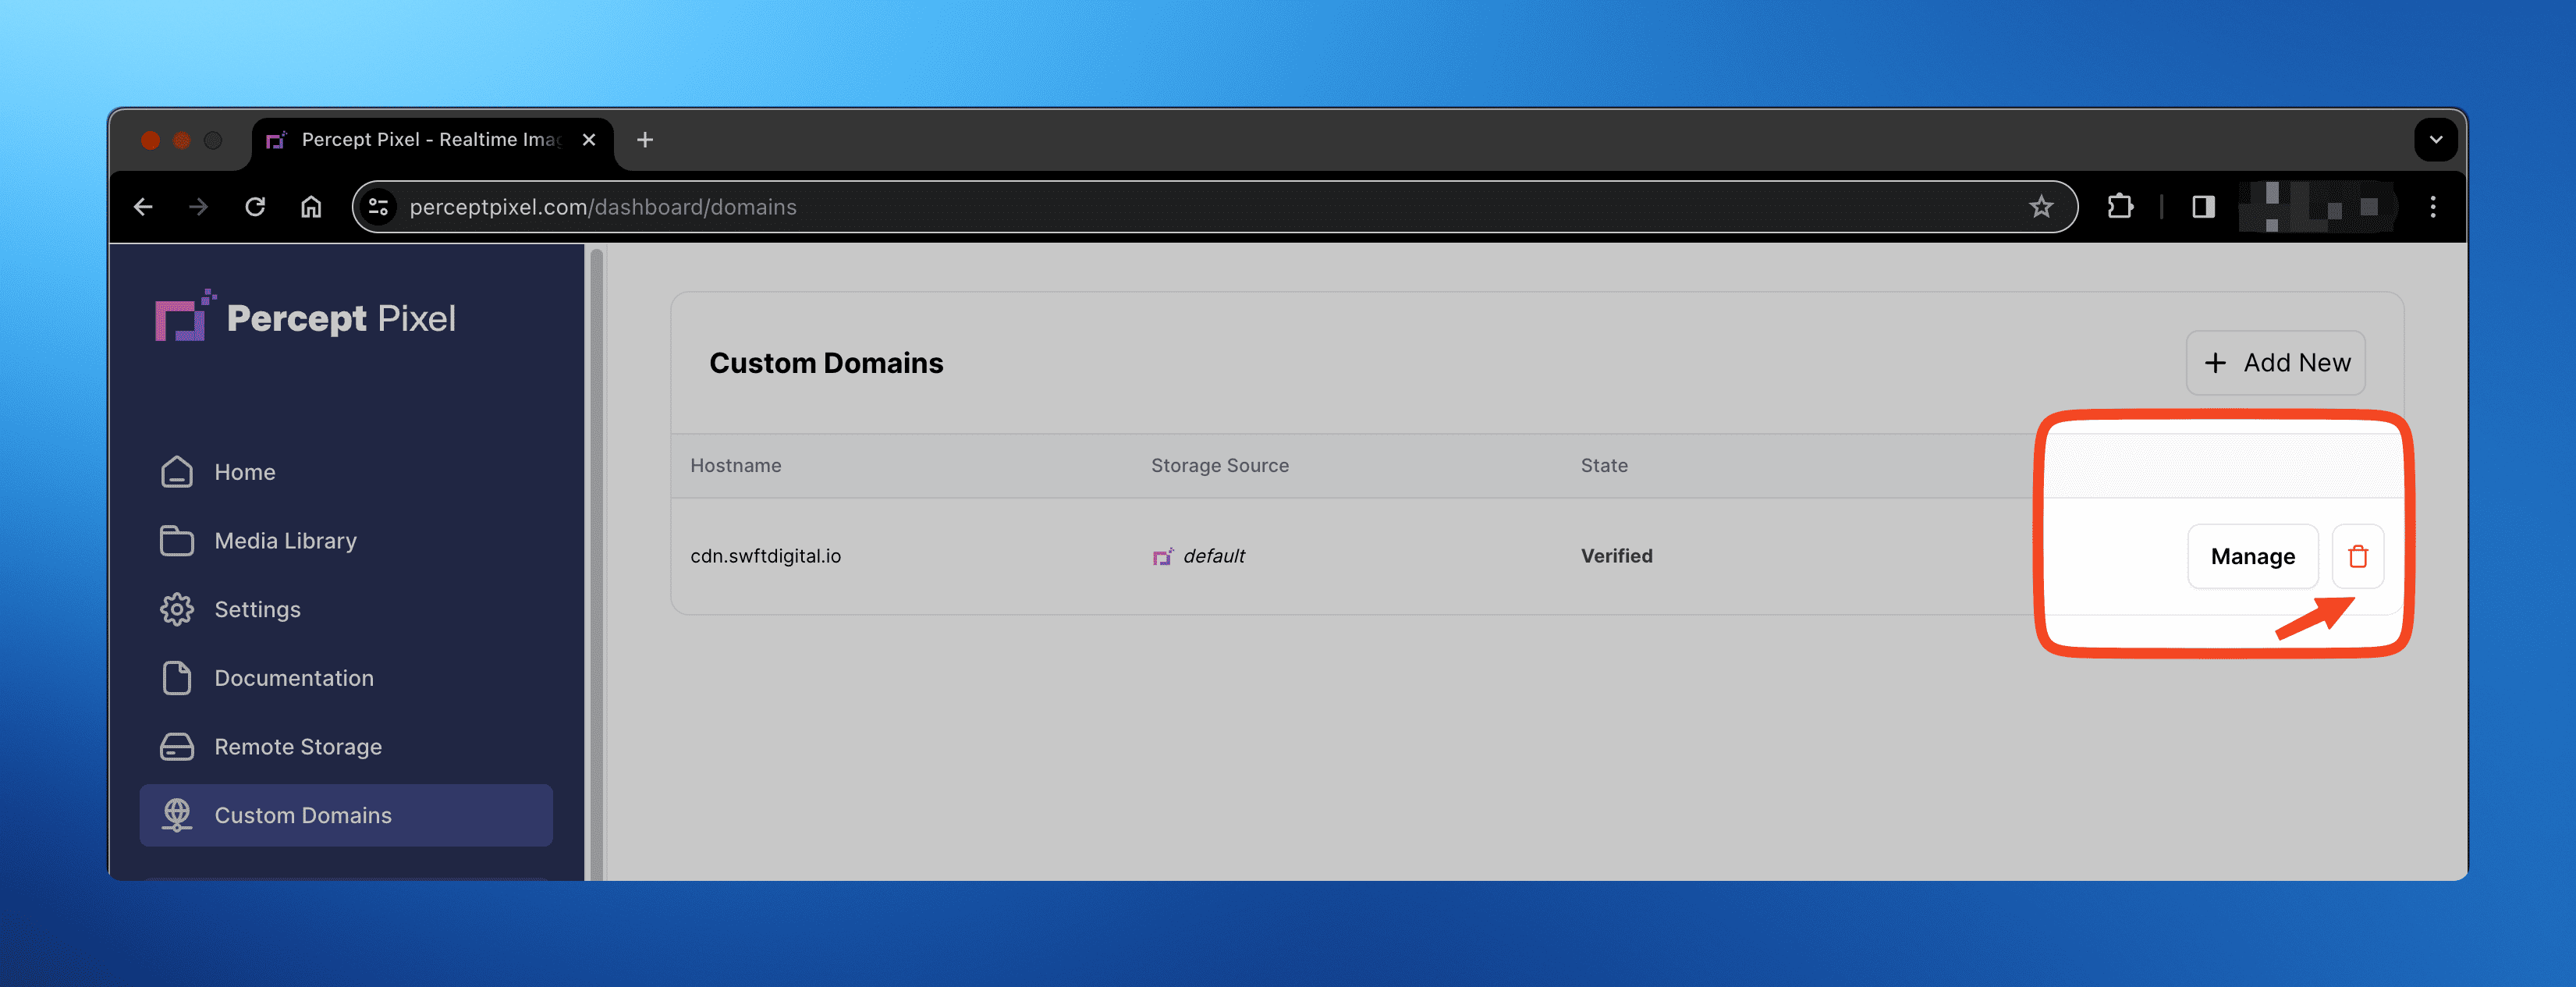
Custom Domains
You can Bring Your Own Domain to PerceptPixel.
Custom Domains can be setup pointing to your Default storage. Any folders or remote origins setup under specific sub-paths (i.e., folders) will be honored. Currently, you can have multiple custom domains pointing to your Default storage.
Custom Domains can also be setup to point to a specific folder or remote origin. Currently only one custom domain can be setup to point to a specific folder or remote origin.
The total number of custom domains that can be setup is limited by your plan.
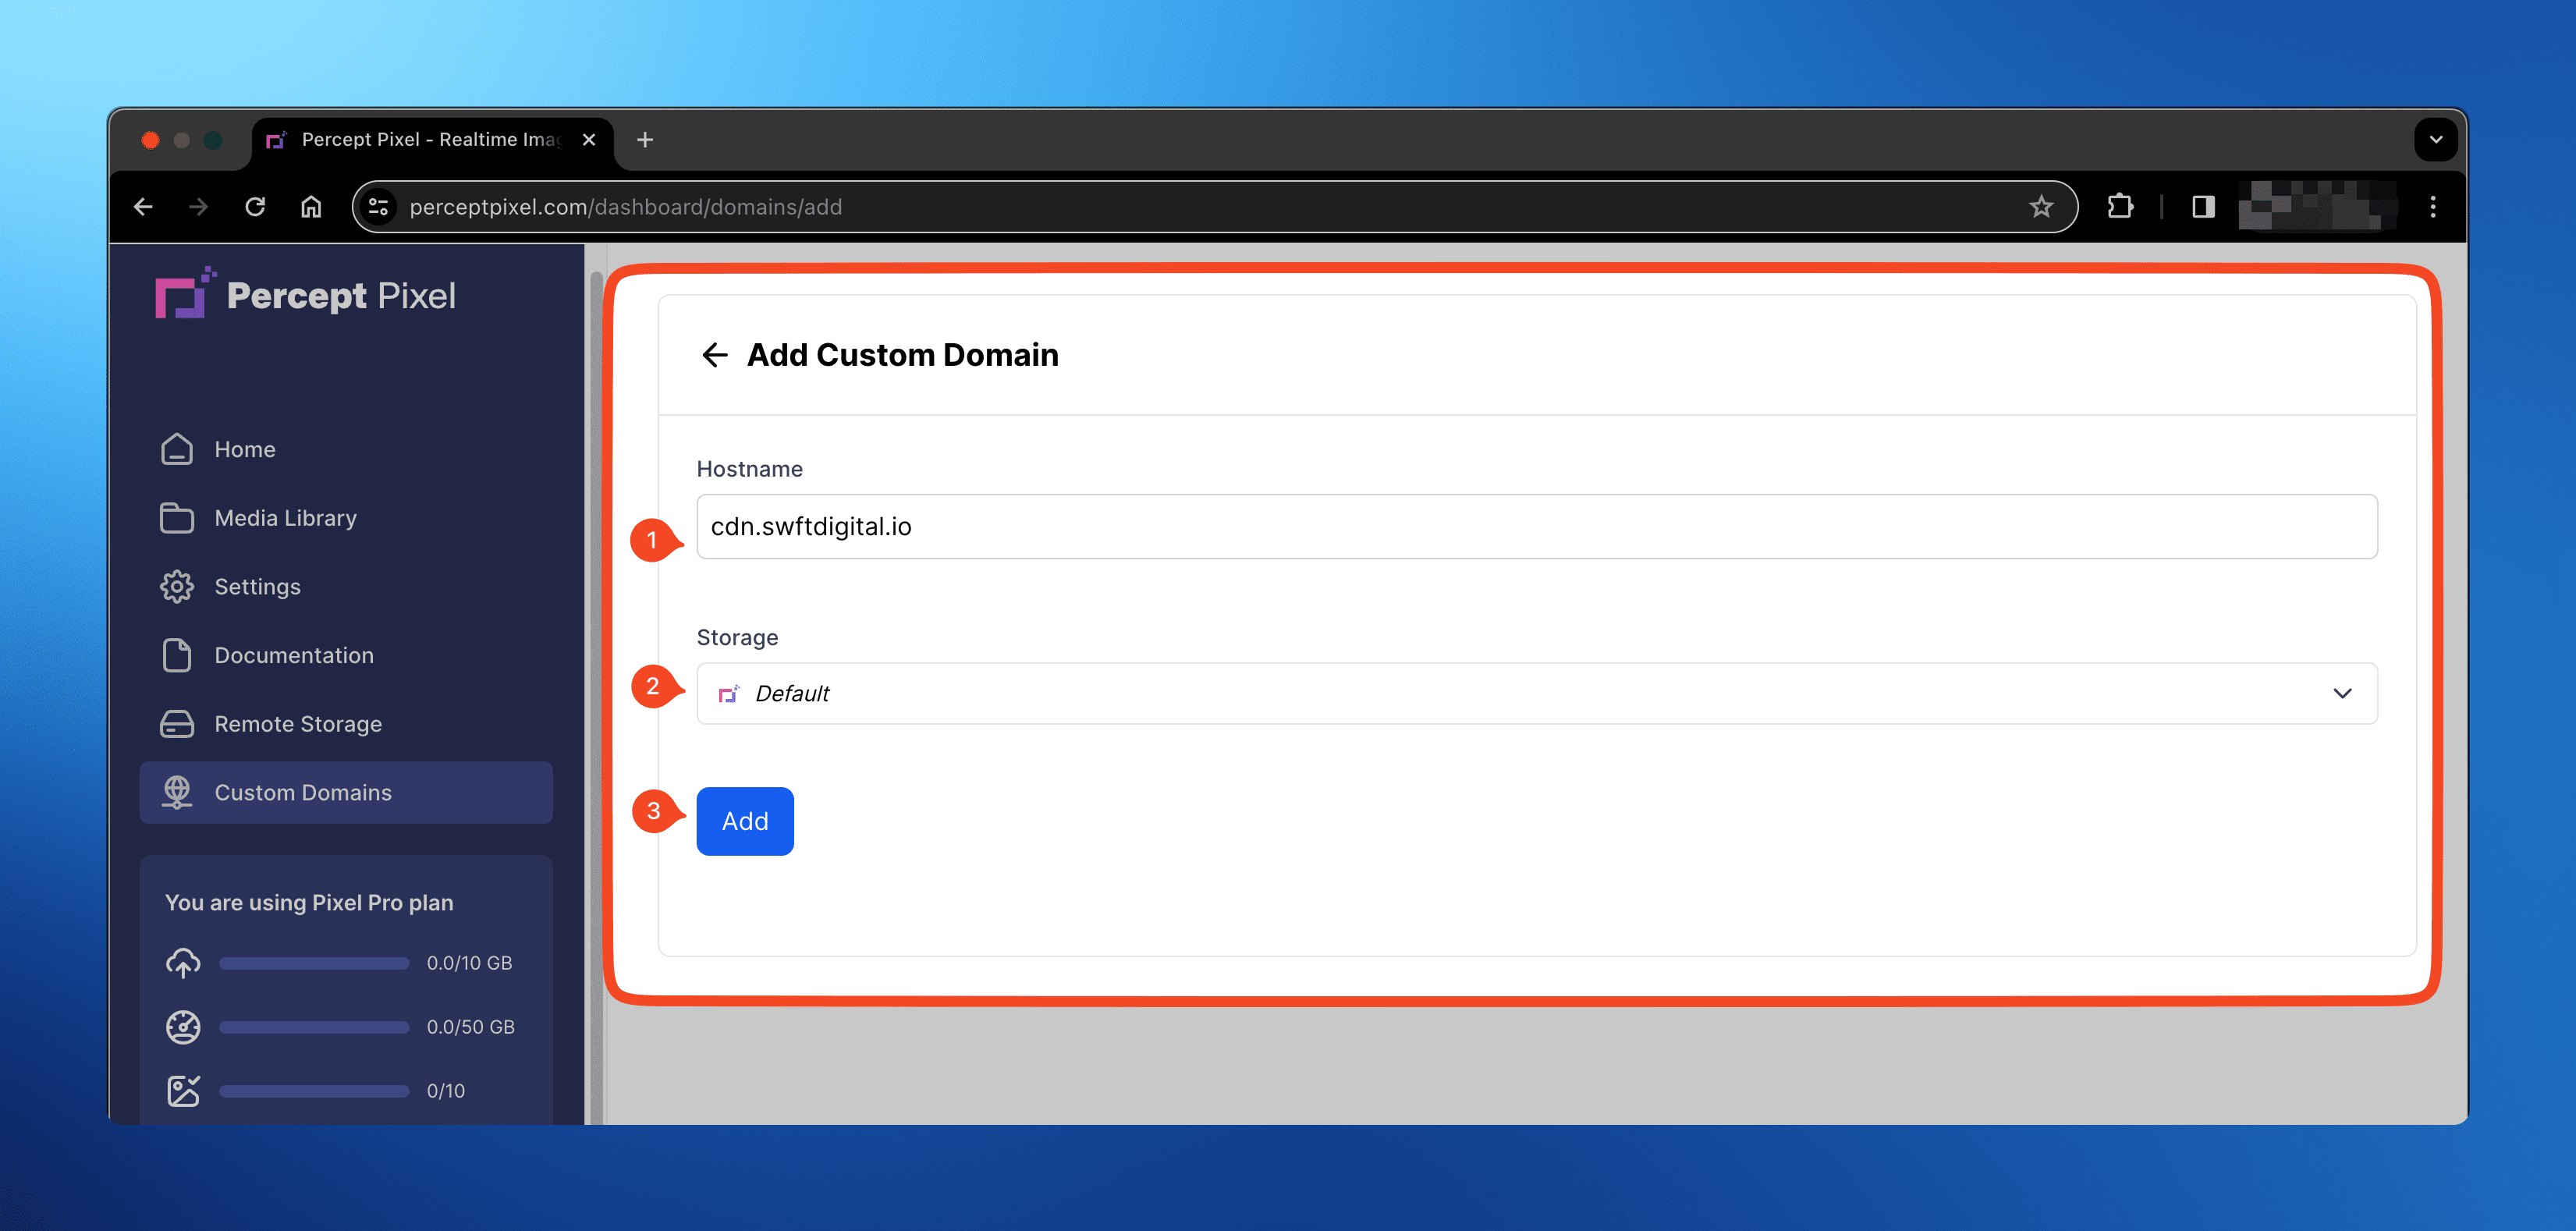
Adding a Custom Domain
To setup a custom domain, follow the steps below.
- Navigate to Custom Domains on the Dashboard.
- Click on the
Add Newbutton. - In the "Hostname" field, enter the custom domain you want to setup without the
http://orhttps://prefix (example: cdn.acmecorp.com). - In the "Storage" field, select the storage you want the custom domain to point to. This can be changed later.
- Click on the
Addbutton.
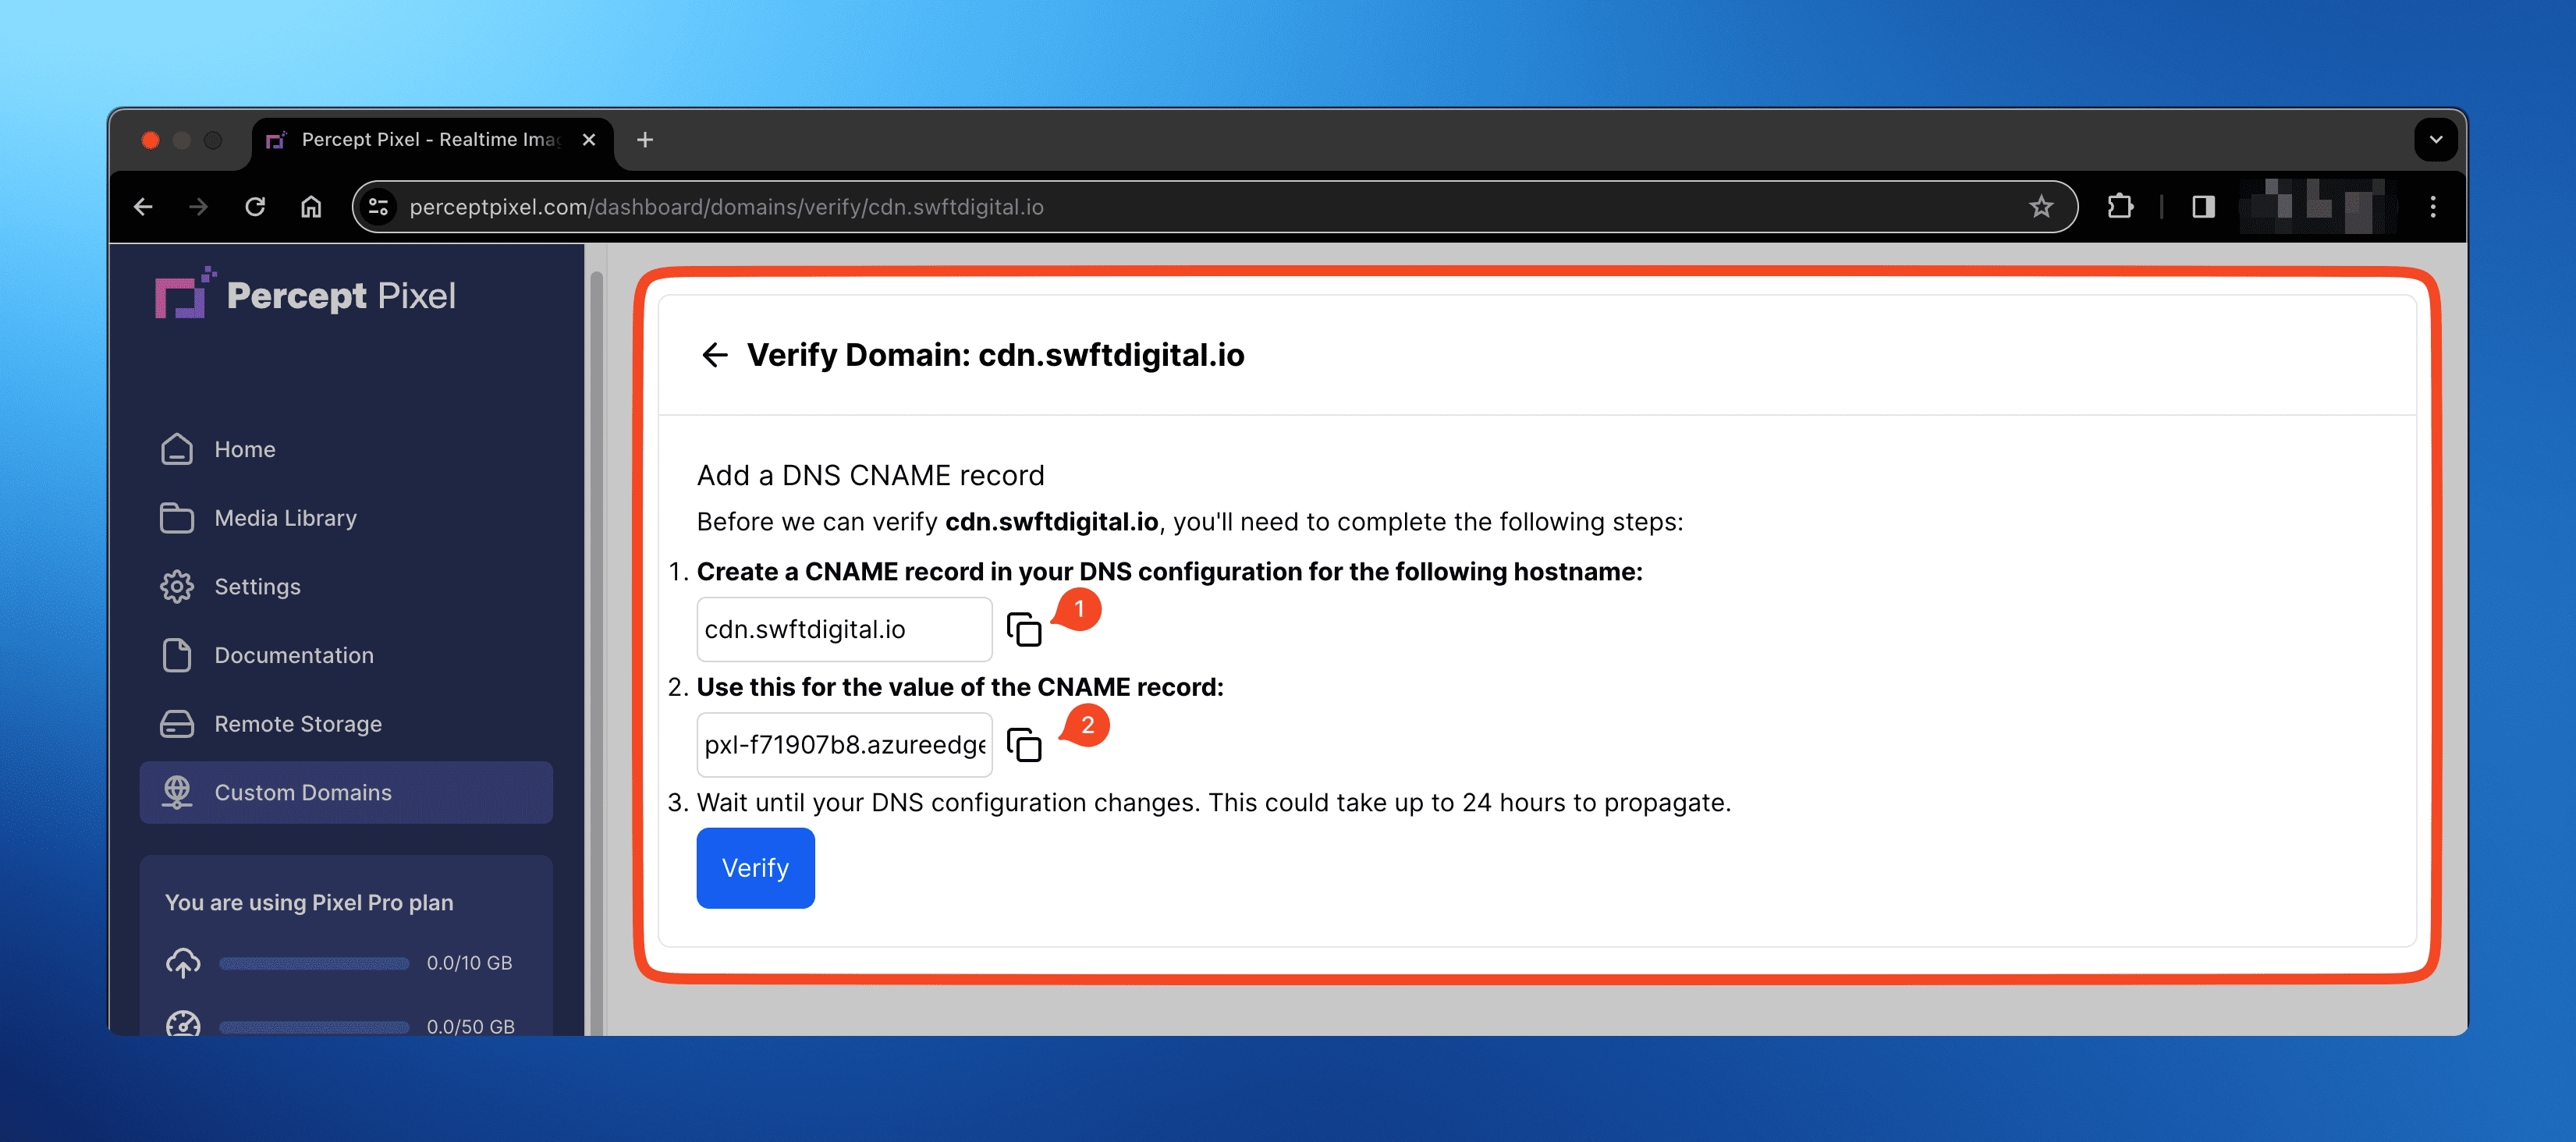
Verifying a Custom Domain
Once you have added a custom domain, you will need to verify it. This is done by adding a CNAME record to your domain's DNS settings.
- From the previous steps, you should be on the "Verify" page.
- Setup the CNAME record in your DNS provider's settings per the instructions provided.
- Click on the
Verifybutton. - If we are able to verify the CNAME record, the custom domain will be marked as verified, and we will begin provisioning the domain.
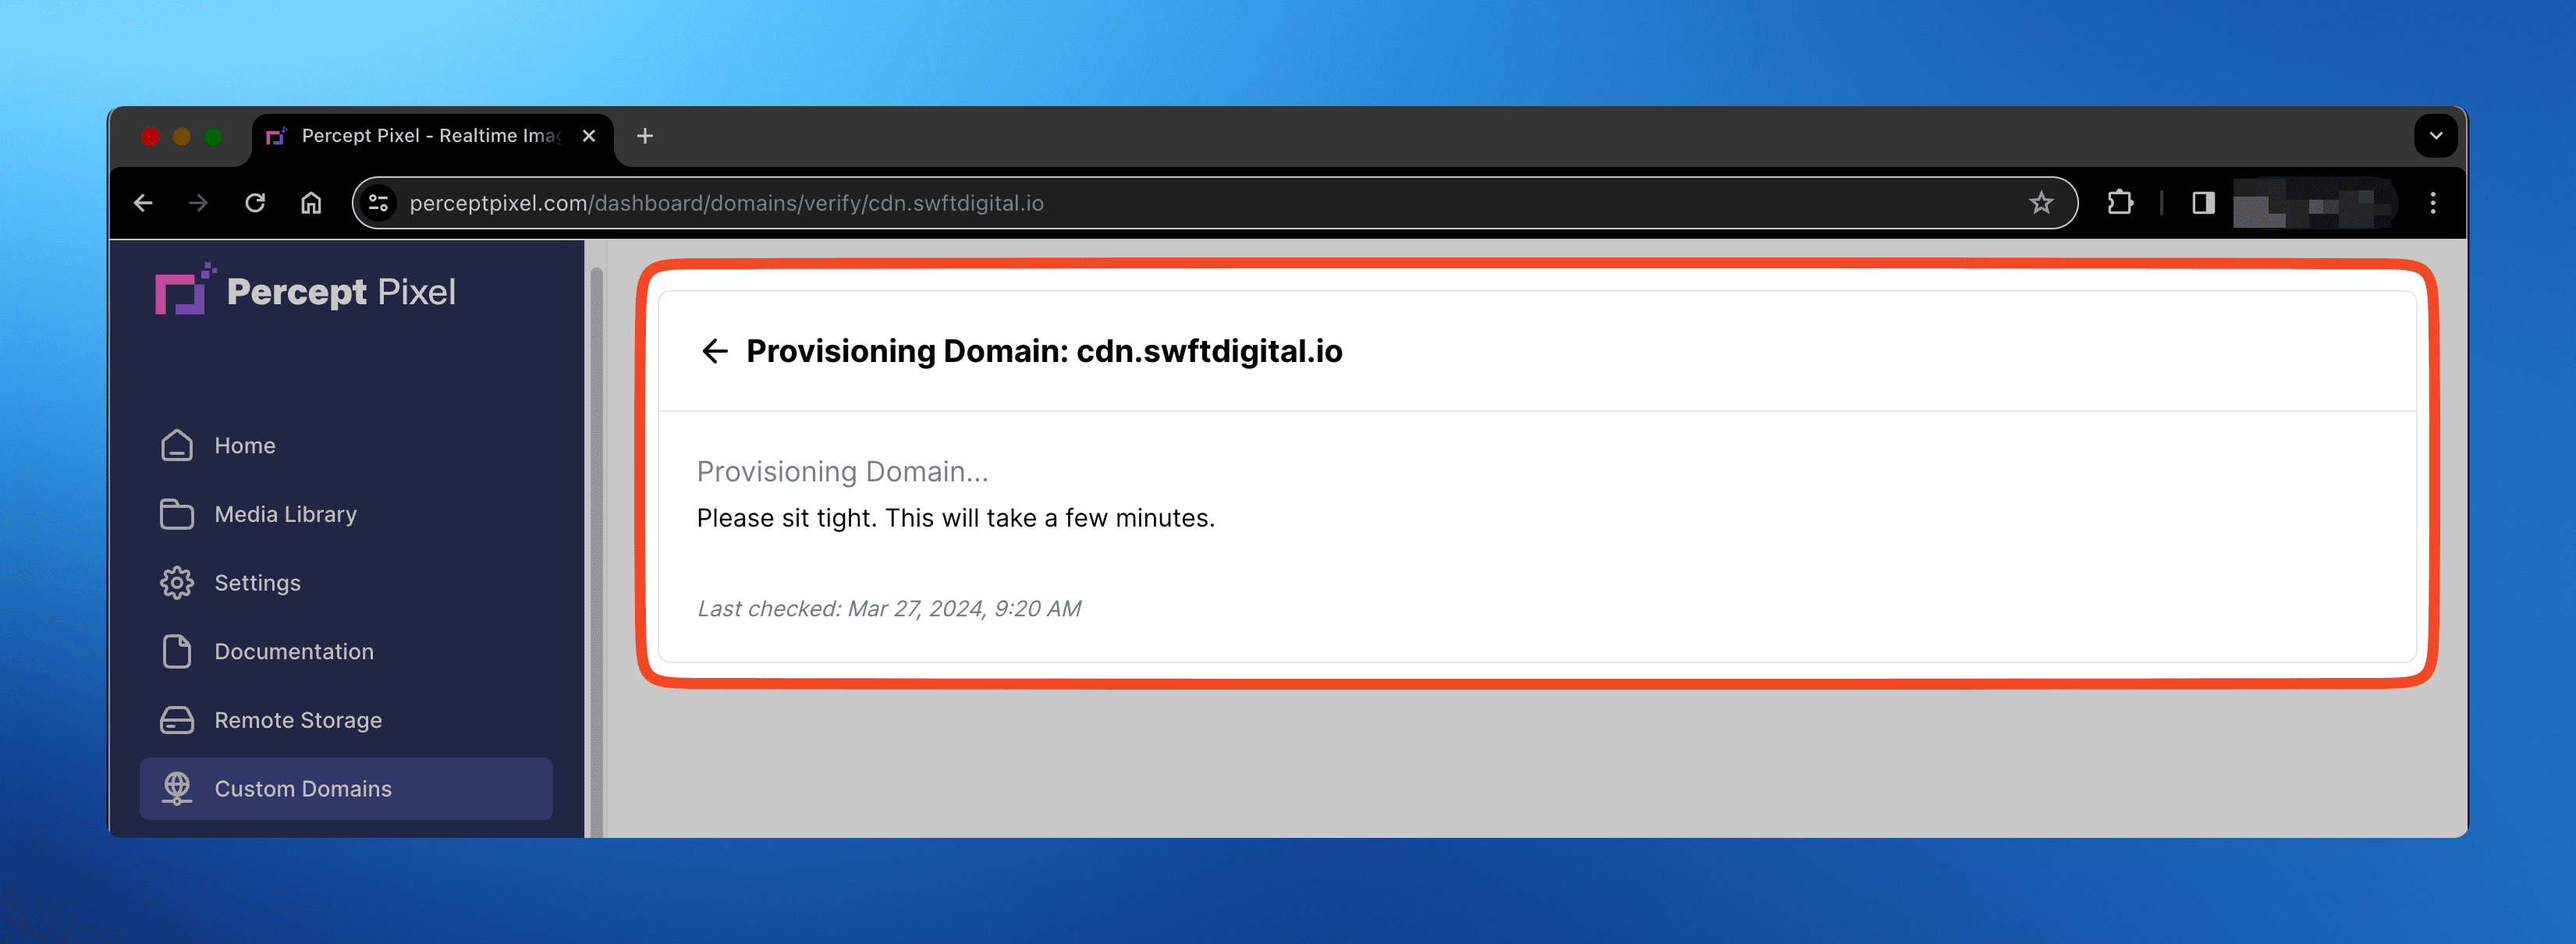
Provisioning a Custom Domain
- From the previous steps, you should be on the "Provisioning" page.
- This process can take a few minutes (up to 15 minutes or more) to complete.
- Once the domain is provisioned, you will be redirected to the "Manage" page.
- You may leave and get your favorite beverage while you wait. This page can be safely closed and re-opened later.
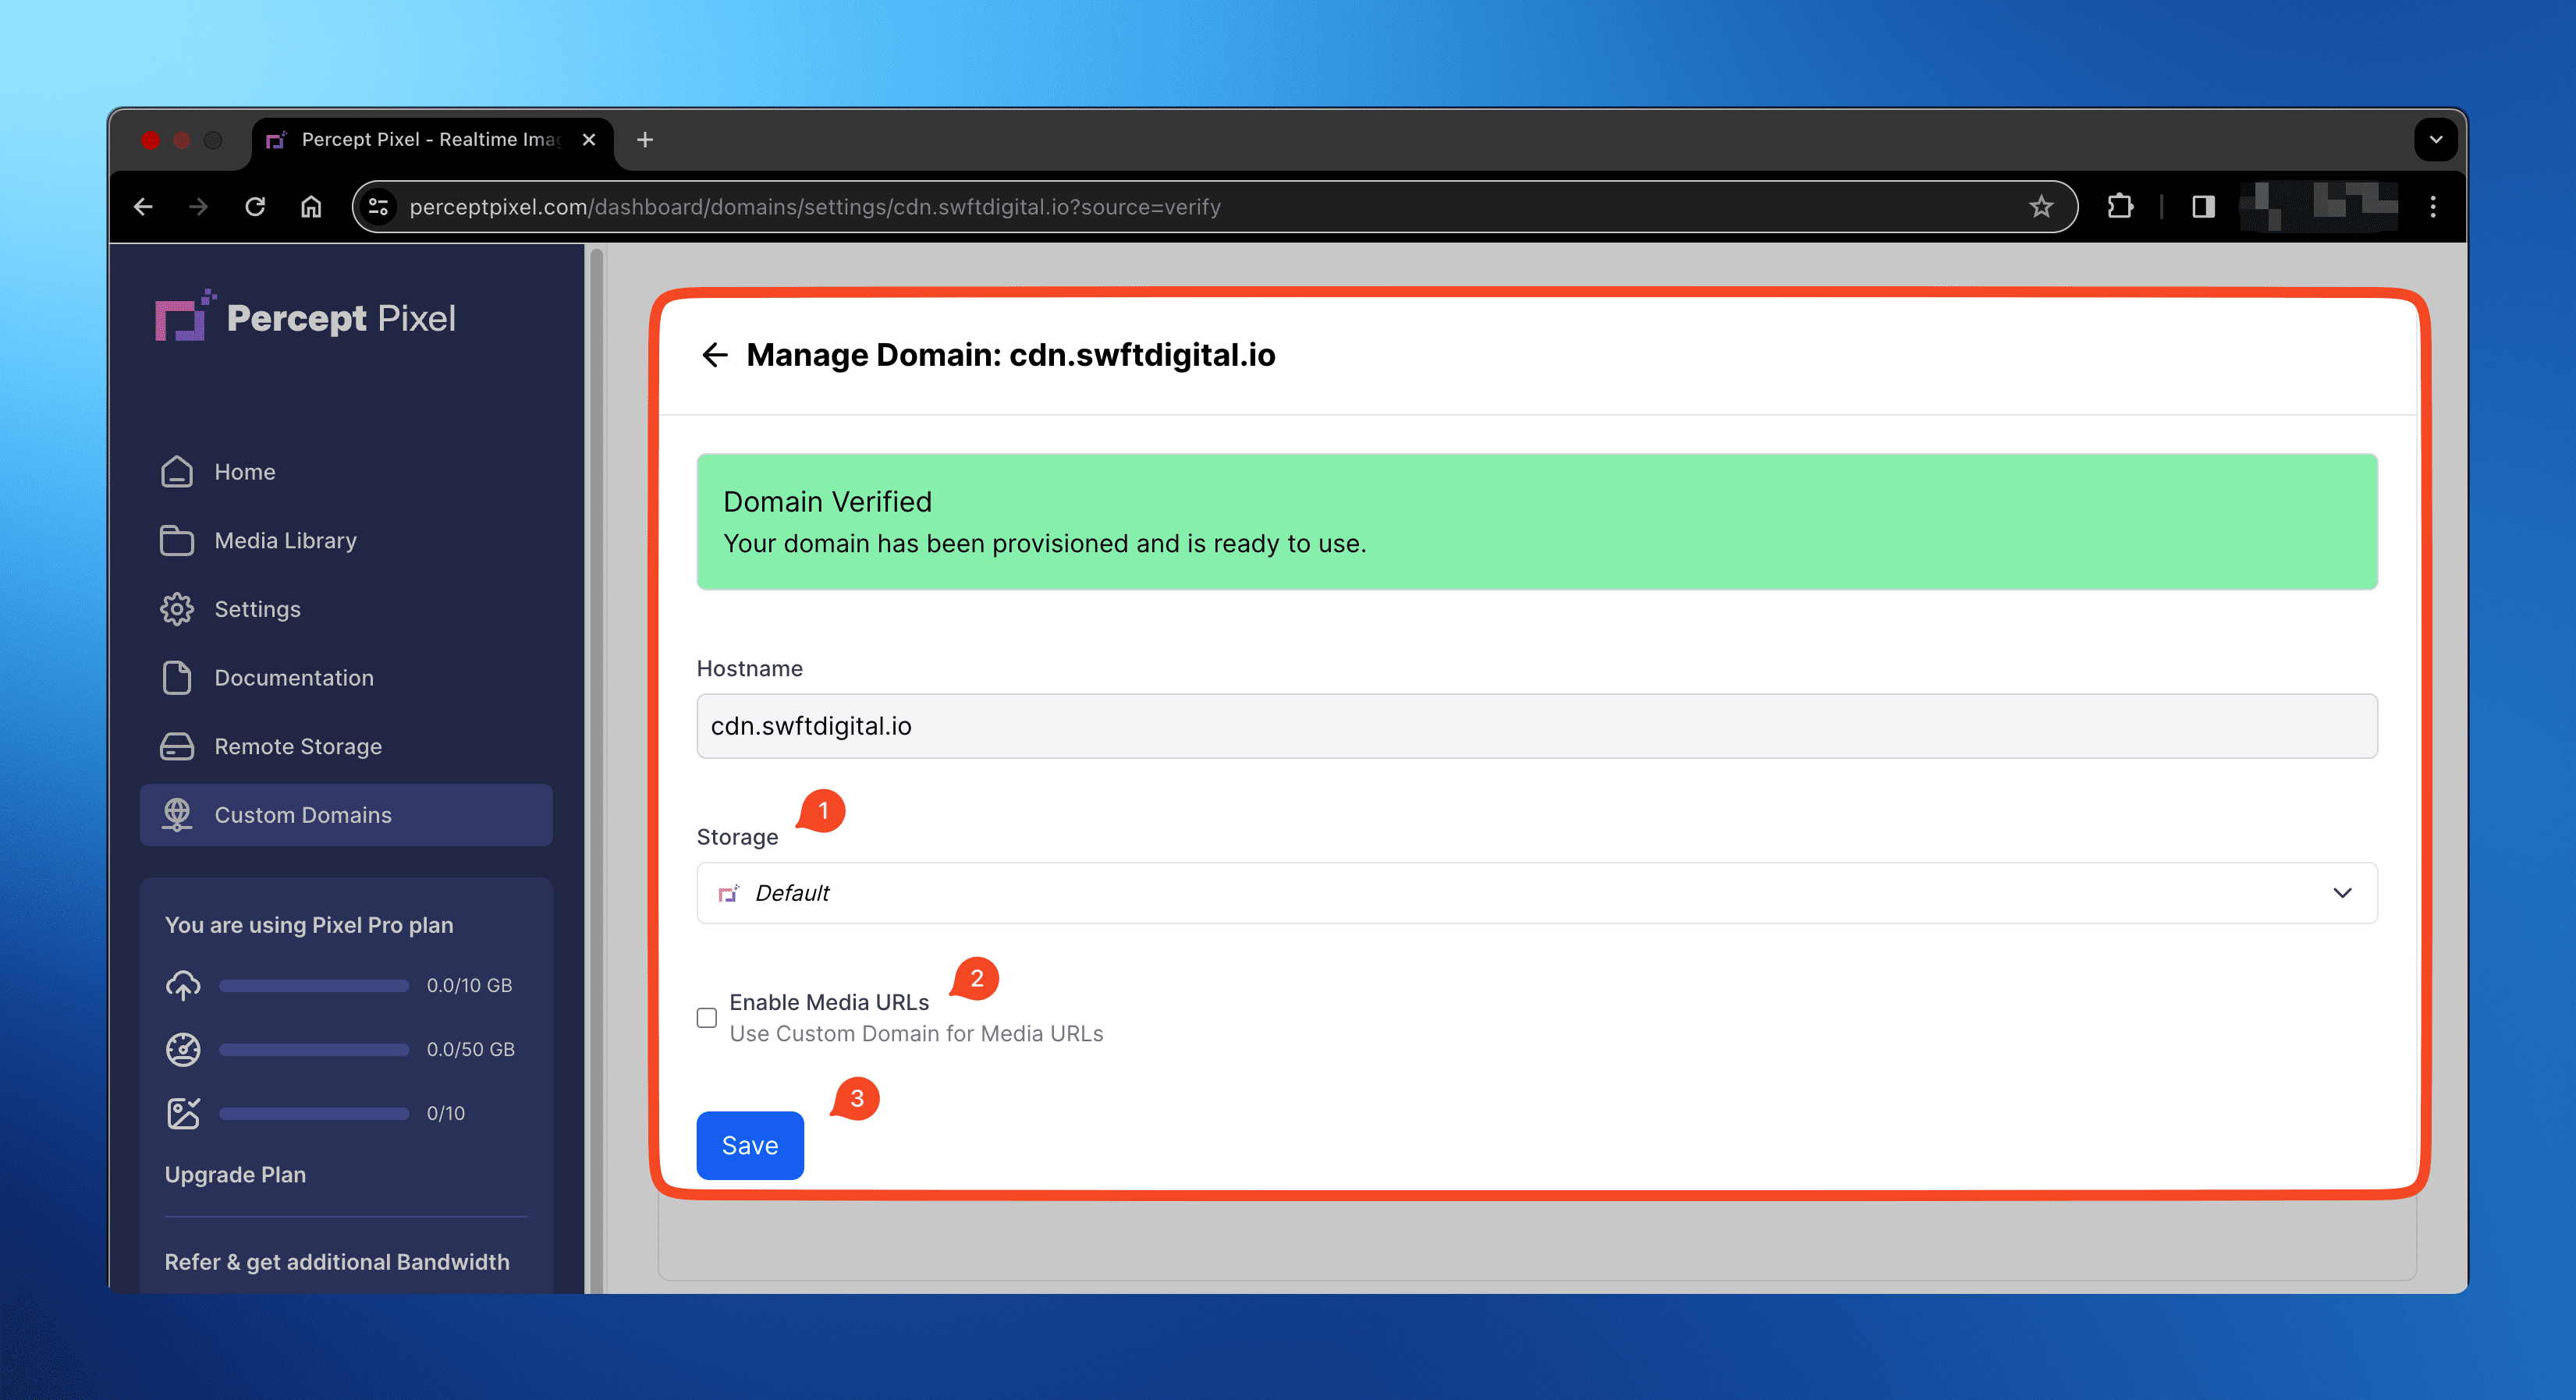
Manage a Custom Domain
- From the previous steps, you should be on the "Manage" page.
- You may change the Storage the custom domain points to, with the "Storage" field.
- You may check the "Enable Media URLs" checkbox to enable using the custom domain for media URLs in the Media Library, WordPress, and other integrations.
- Do not forget to click on the
Savebutton if making any changes.
Delete a Custom Domain
- From the Custom Domains page, find your domain you want to delete in the list, and click on the
Deleteicon. - If the Domain has been provisioned, you will be asked to remove the
CNAMErecord from your DNS settings, before you can proceed with the deletion.