Resize & Quality
In both web and mobile applications, resizing images is crucial for adapting to various screen sizes and optimizing bandwidth usage. PerceptPixel offers a solution for effortlessly resizing your images.
Delivering full-size images can significantly slow down web page loading times, leading to a suboptimal user experience. PerceptPixel provides a convenient server-side solution, enabling dynamic transformation of original images. This allows you to render images of any dimension on web or mobile platforms without the need to store multiple versions on blob storage.

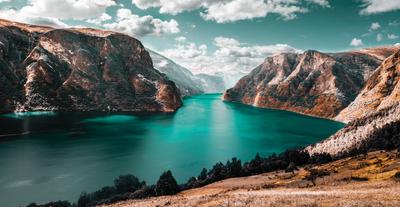
https://img.perceptpixel.com/demo-brjexrkh/mar-bustos-ARVFsI-32Uk-unsplash.jpg
Resize dimensions and Quality
You can set the target dimensions of your resized image by specifying width and height
Syntax
w_<int>- Using an integer value for w (width) sets the new width of the image to that number in pixels. For example,w_150sets the width to exactly 150 pixels.h_<int>- Using an integer value for h (height) sets the new width of the image to that number in pixels. For example,h_150sets the width to exactly 150 pixels.q_<int|string>- Using an integer value for q (quality) sets the quality percentage of the image. For exampleq_90sets the quality to 90%. You can also use the following quality types followed byq_auto:good- Sets the quality to 85%auto:best- Sets the Quality to 95%auto:eco- Sets the Quality to 80%
1. Set Width of the Image
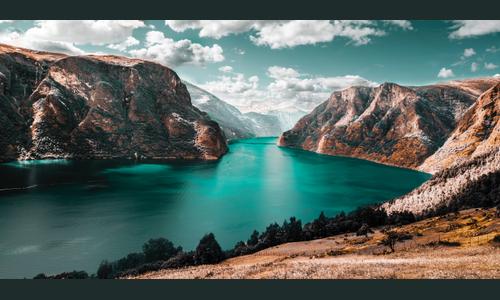
https://img.perceptpixel.com/demo-brjexrkh/w_400/mar-bustos-ARVFsI-32Uk-unsplash.jpg
2. Set Height of the Image

https://img.perceptpixel.com/demo-brjexrkh/h_200/mar-bustos-ARVFsI-32Uk-unsplash.jpg
3. Set Quality of the Image

https://img.perceptpixel.com/demo-brjexrkh/w_400,q_60/mar-bustos-ARVFsI-32Uk-unsplash.jpg
4. Set Width and Height of the image

https://img.perceptpixel.com/demo-brjexrkh/w_500,h_300/mar-bustos-ARVFsI-32Uk-unsplash.jpg
5. Set Width and Height of the image with Padding
https://img.perceptpixel.com/demo-brjexrkh/w_500,h_300,c_pad/mar-bustos-ARVFsI-32Uk-unsplash.jpg
 w_300
w_300 w_400,h_200 - Aspect Ratio maintained
 w_400,q_90
 w_500,h_300,c_pad
By default while using padding, background color is auto selected. To Change background colour, use b_ operation.
For example - https://img.perceptpixel.com/demo-brjexrkh/w_500,h_300,c_pad,b_255-255-255/mar-bustos-ARVFsI-32Uk-unsplash.jpg