Custom Domains with WordPress
Following the custom domains guide, you can setup a custom domain for serving images on your WordPress site, instead of using the default domain provided by PerceptPixel.
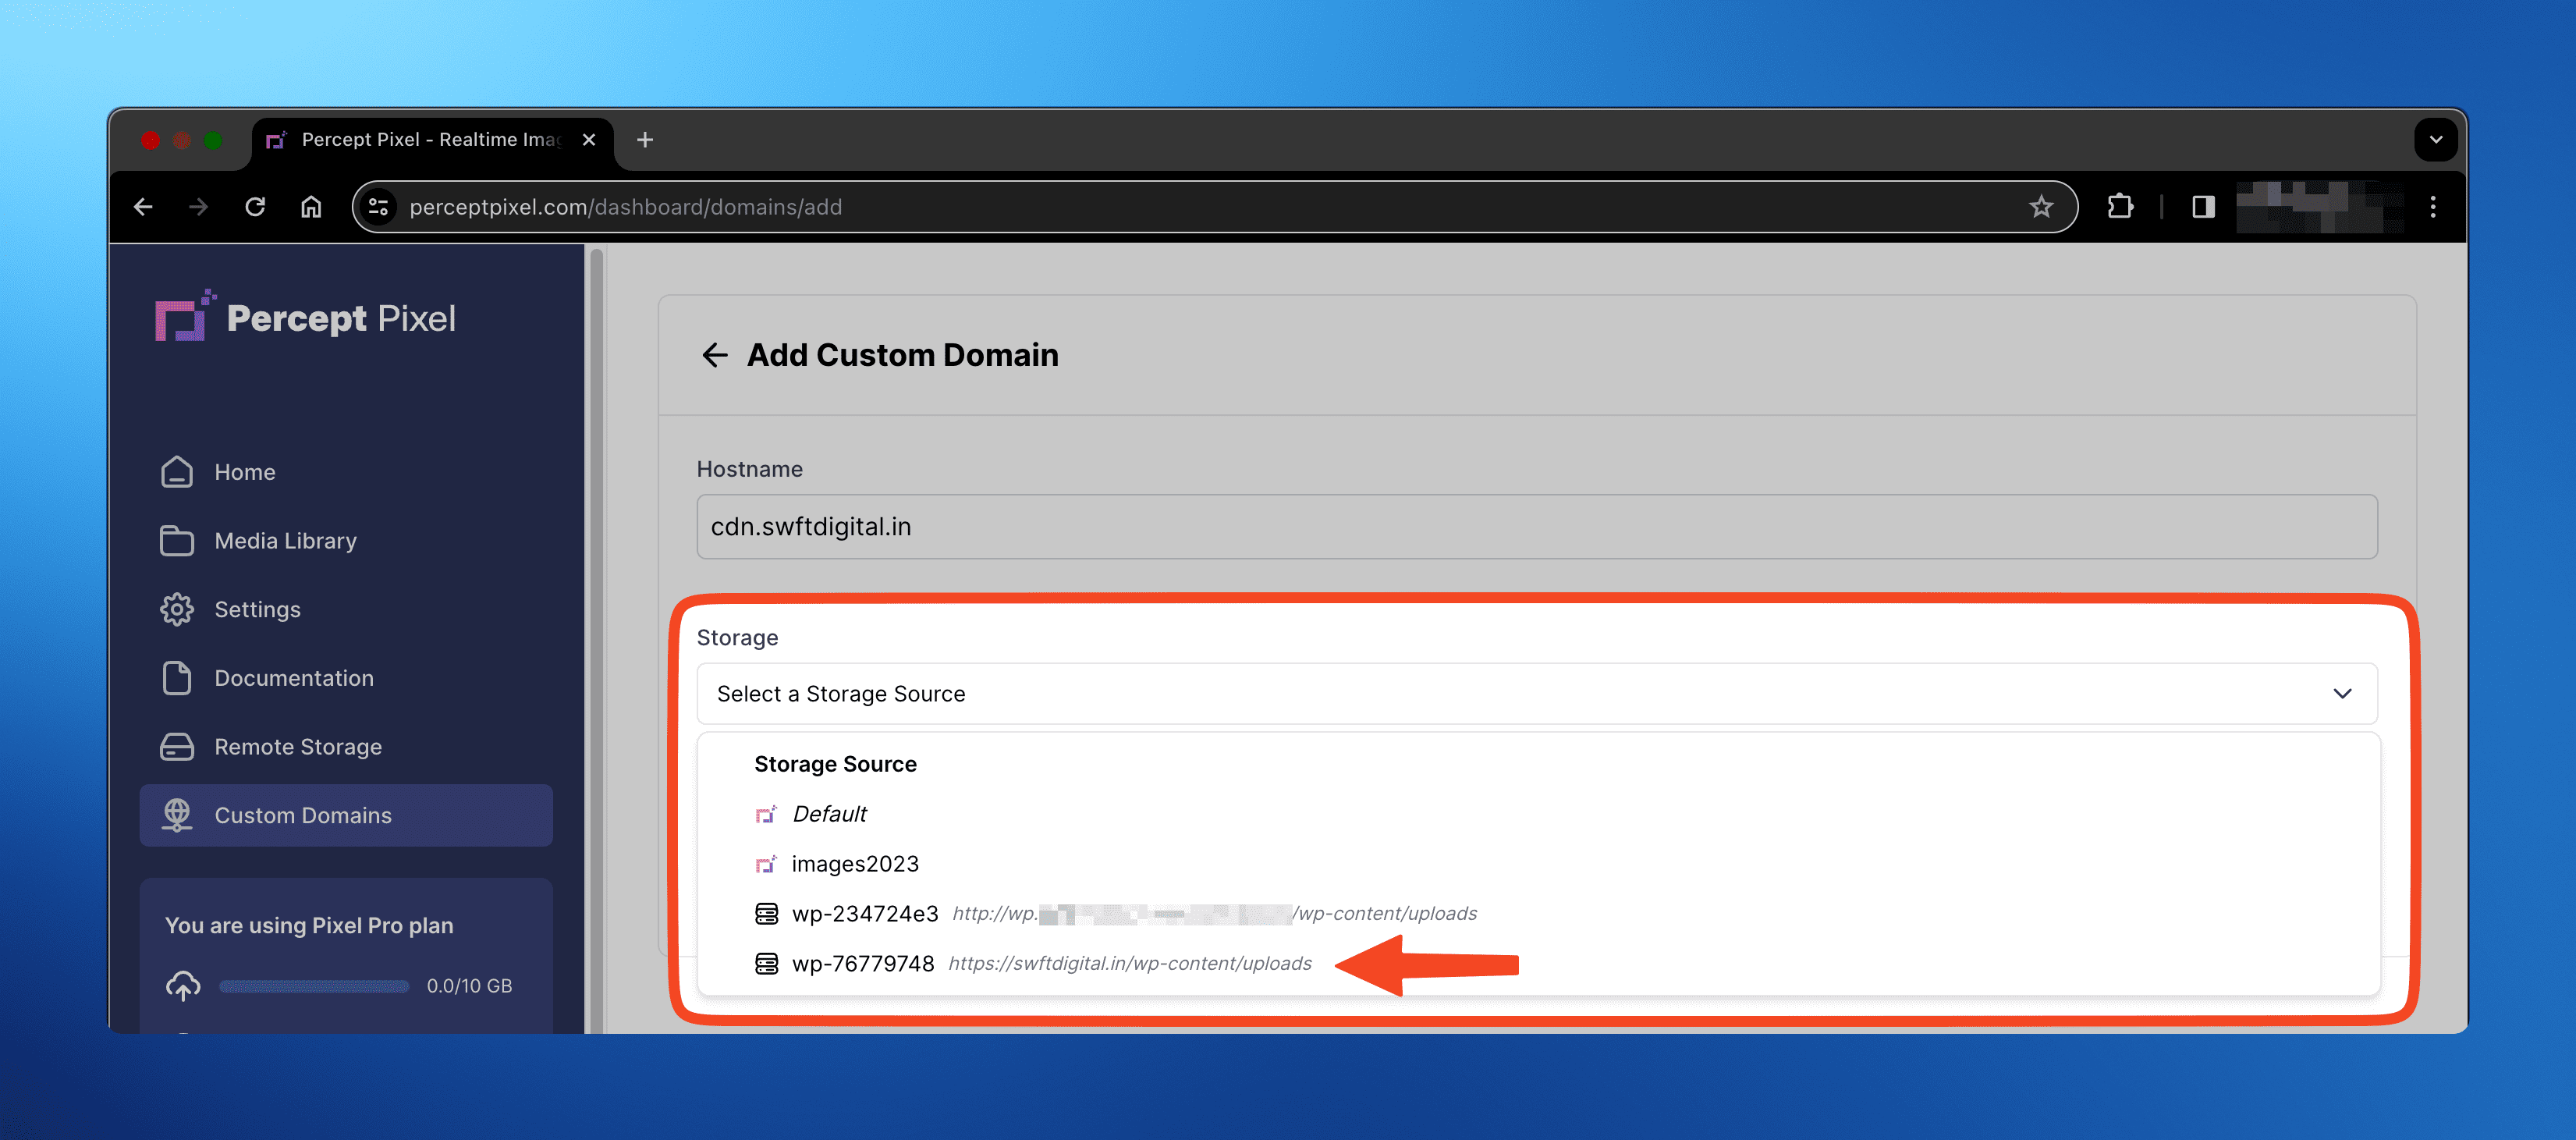
The way the WordPress plugin works is by creating a Remote Storage source in your PerceptPixel organization, and then configuring it's origin to your WordPress content directory. We can point a custom domain
- In the Adding a Custom Domain section, you may select the WordPress storage source in the "Storage" field.
- If you missed doing this, you may do the same in the Manage a Custom Domain section.
- Enable Media URLs on this Custom Domain, and hit
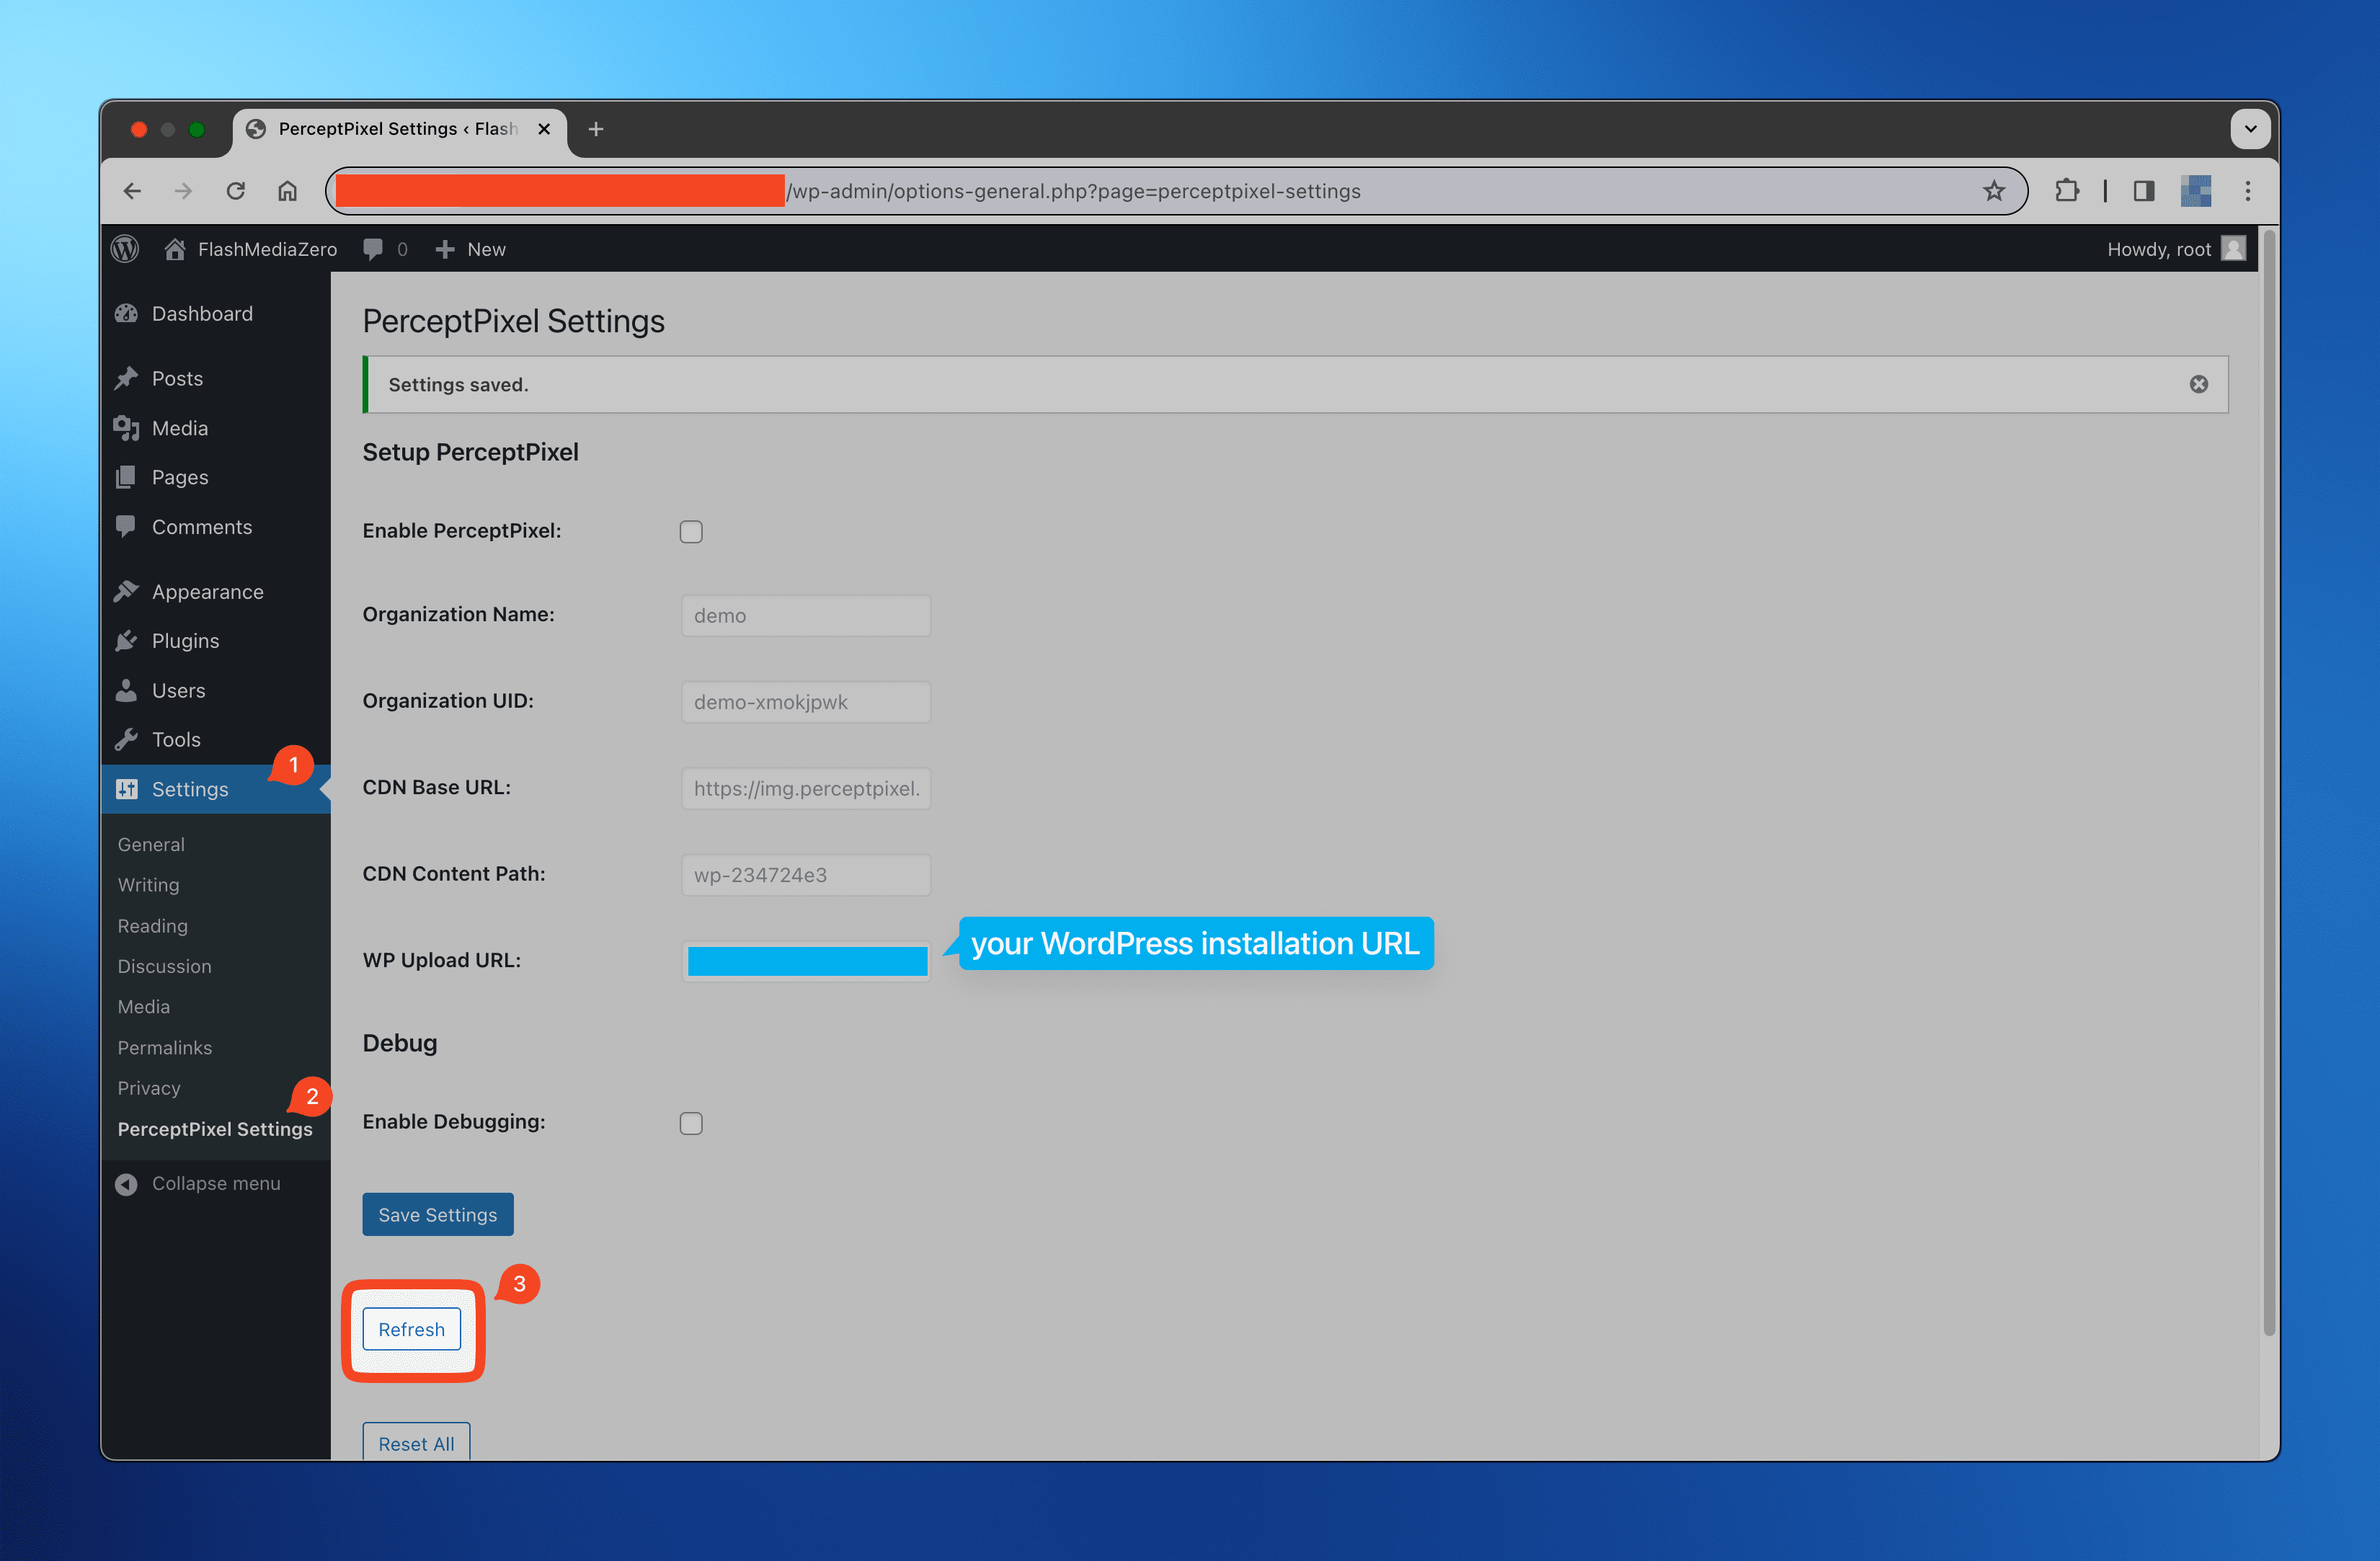
Save. - Once "Media URLs" are enabled, go back to your WordPress site, under Settings > "PerceptPixel Settings", and hit the "Refresh" button.
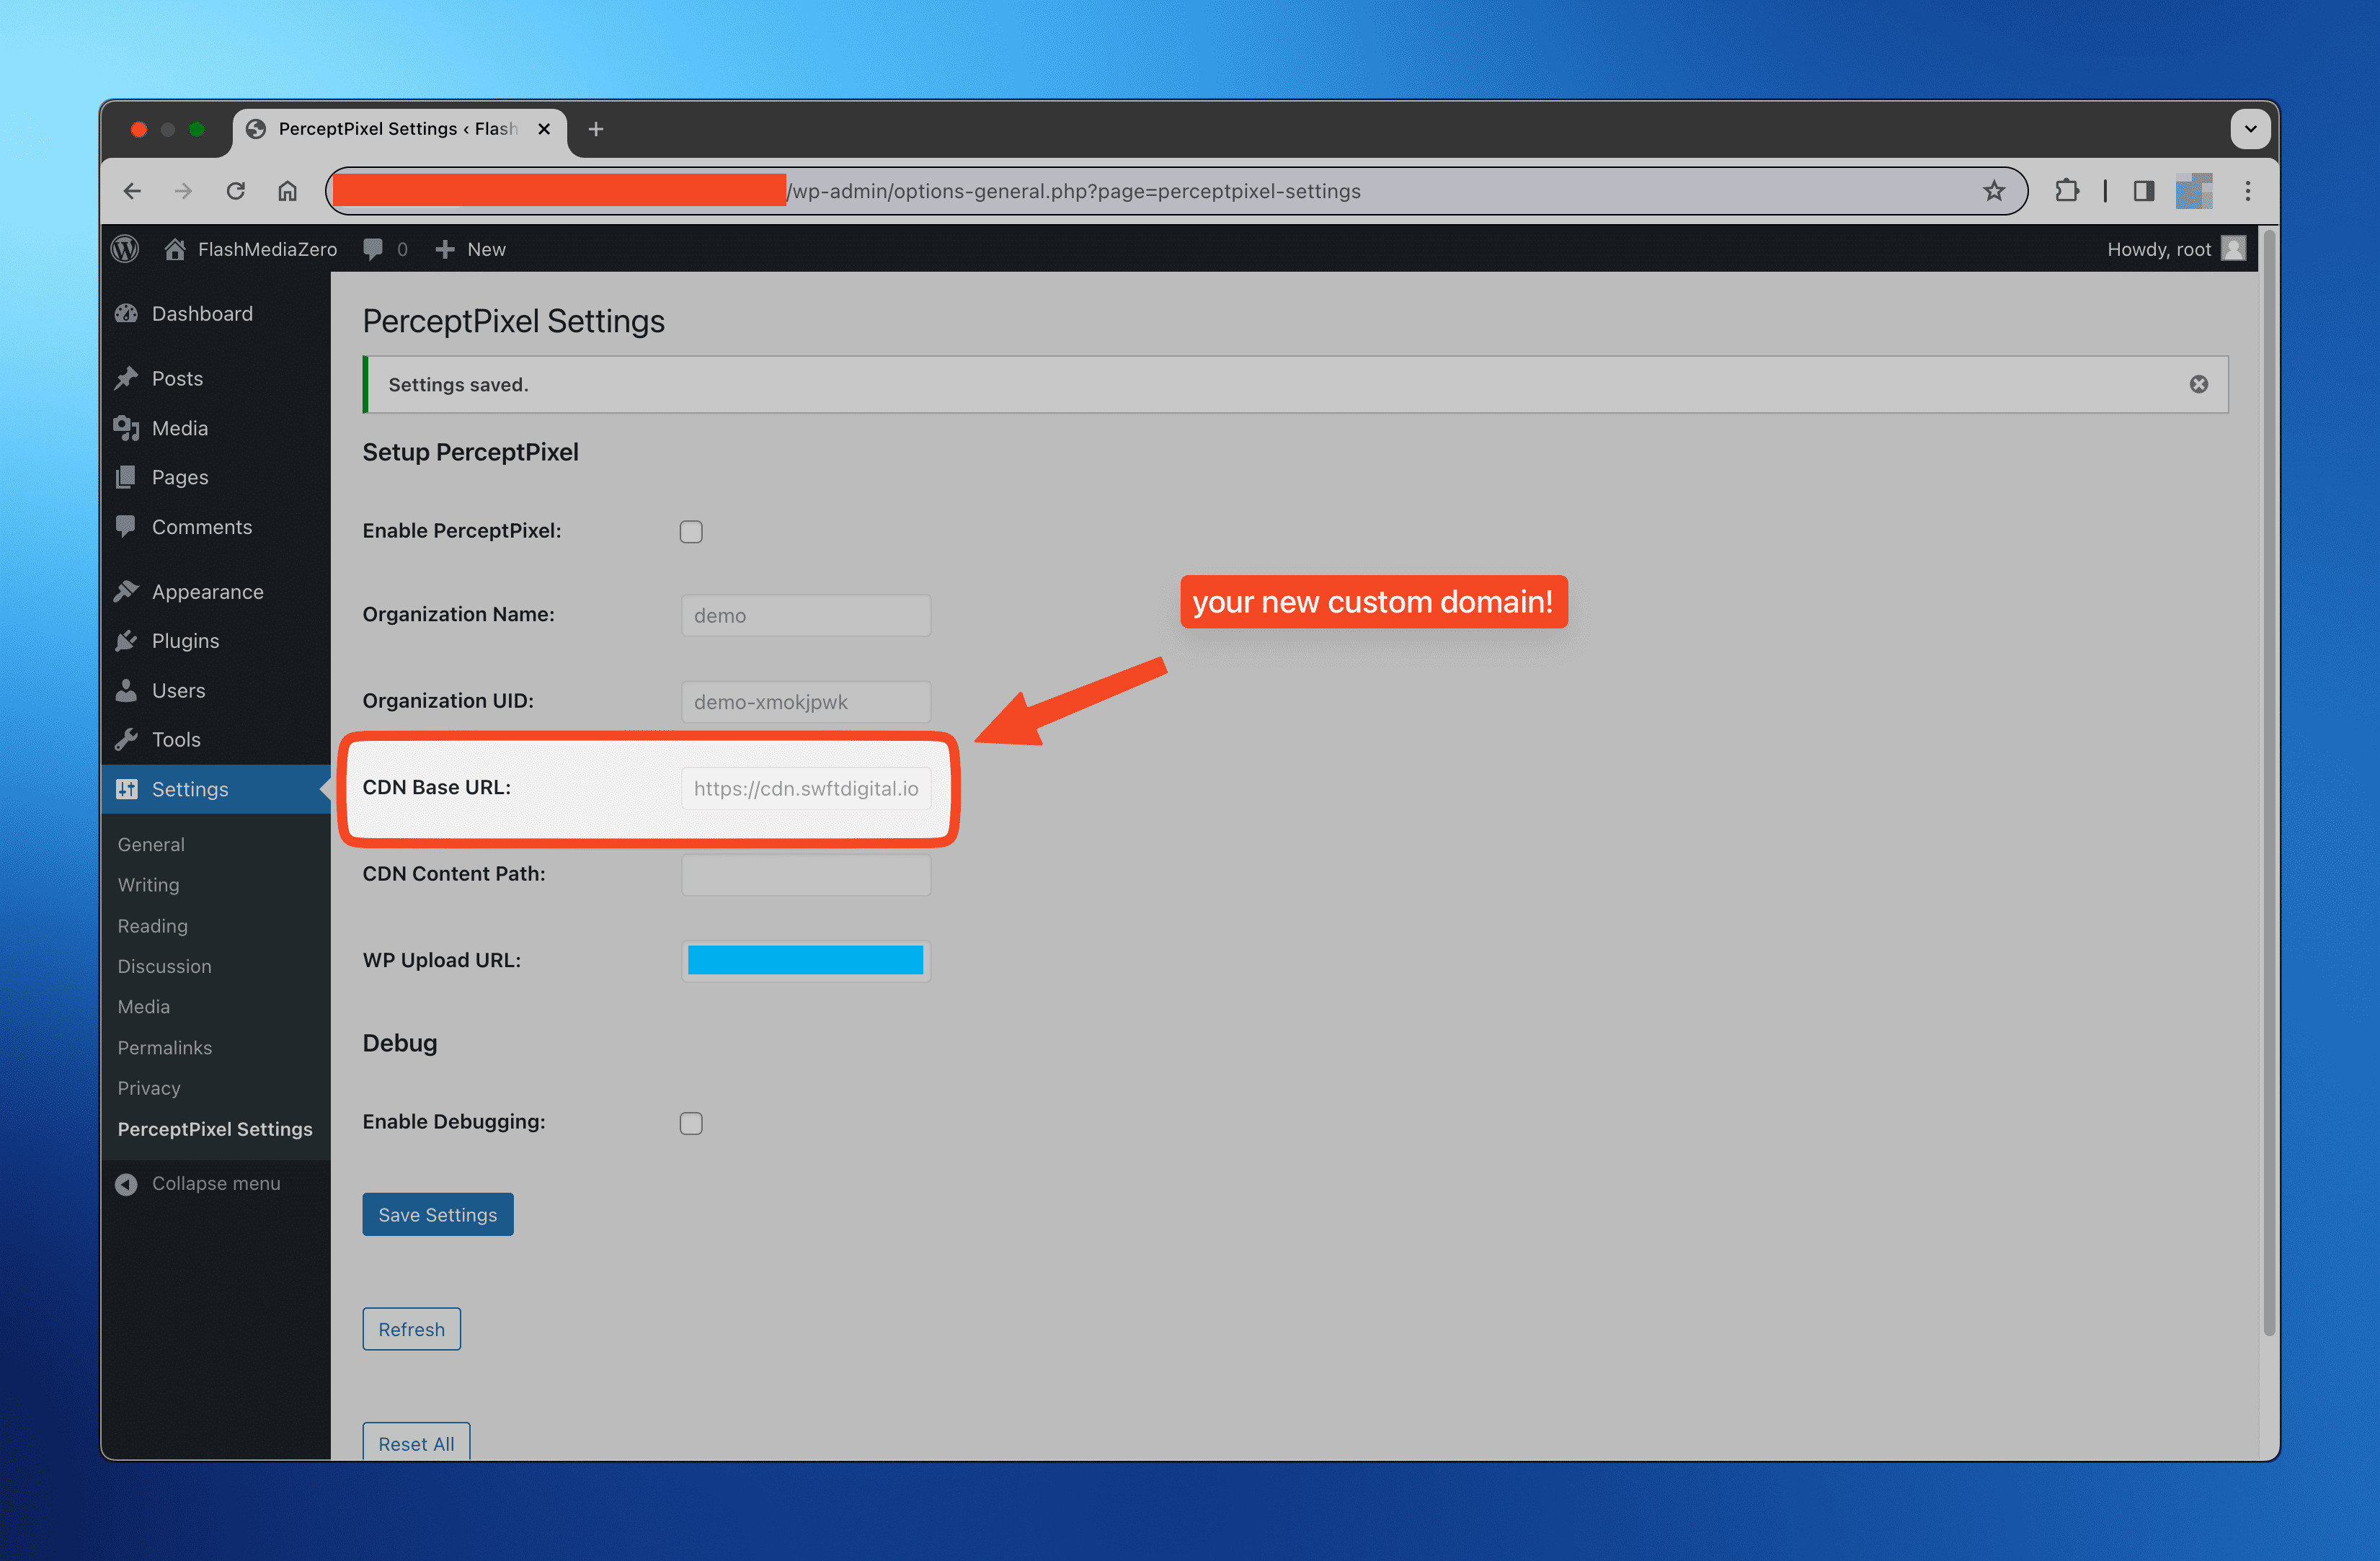
- You should now see the Custom Domain in the "CDN Base URL" field.
- WordPress will now serve images from the custom domain you've configured.