Plugin Installation
You may download the latest version of the plugin below:
You may find older versions of the plugin listed here.
Installation
- Download the latest version of the plugin from the section above.
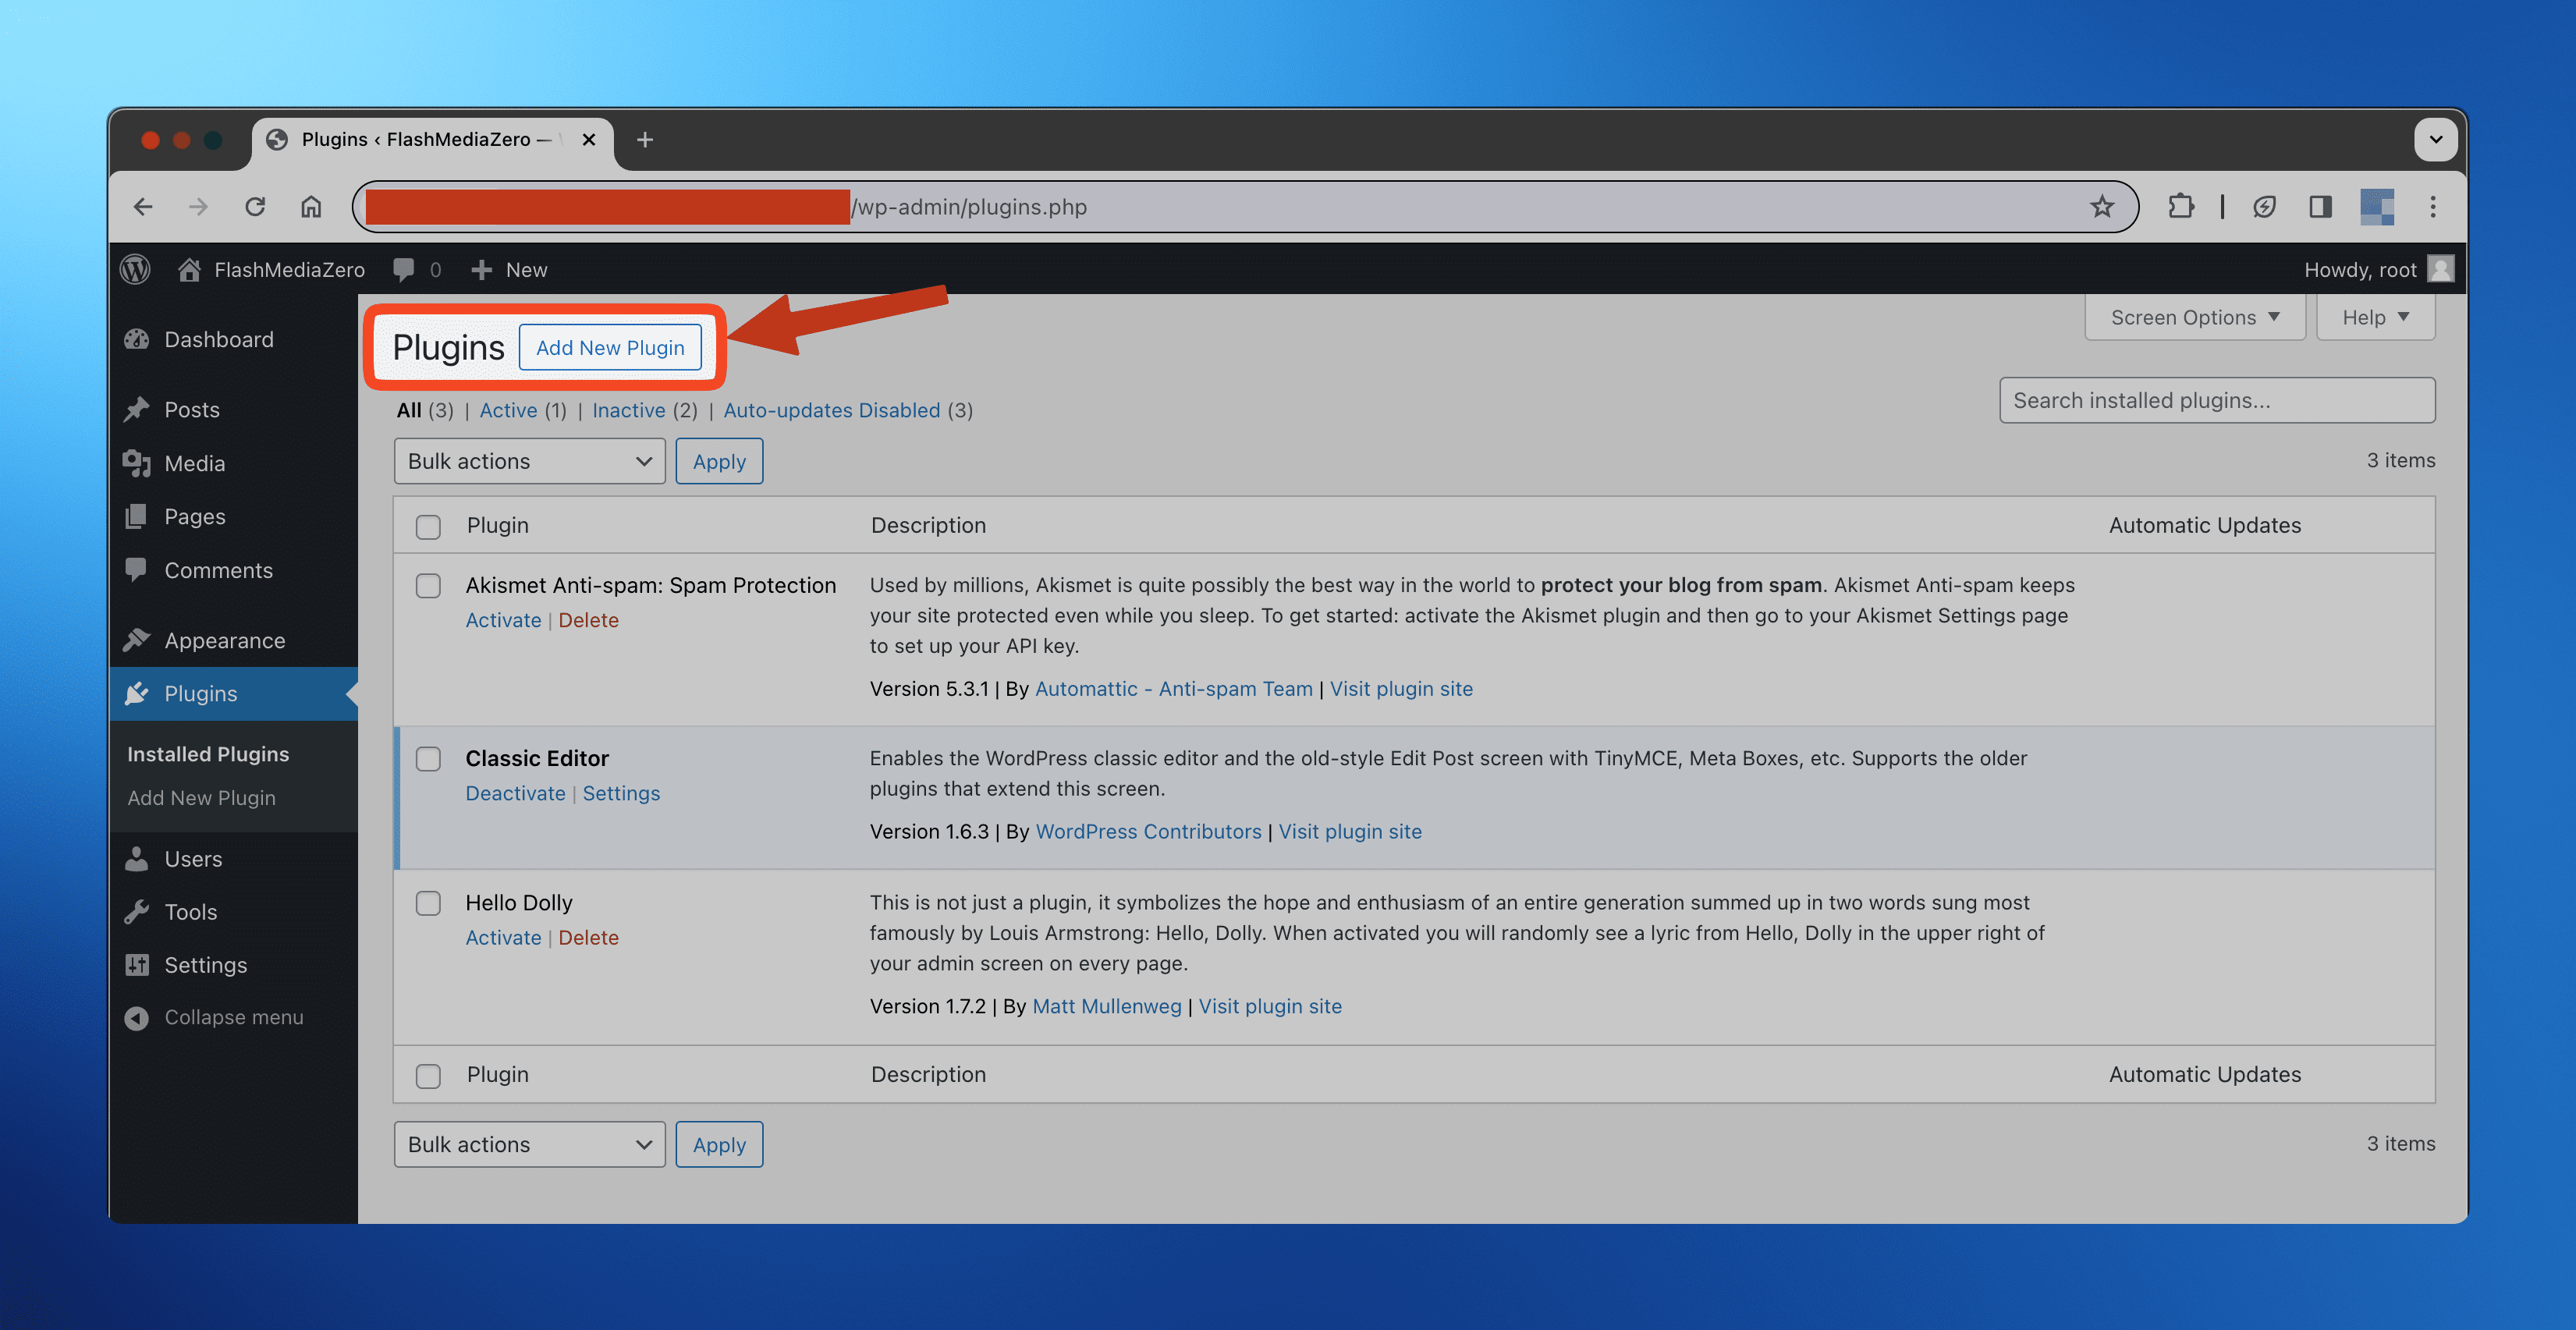
- Navigate to the Plugins page on your WordPress admin dashboard. This is typically at the path
/wp-admin/plugins.php. - Click on the Add New Plugin button at the top of the page.
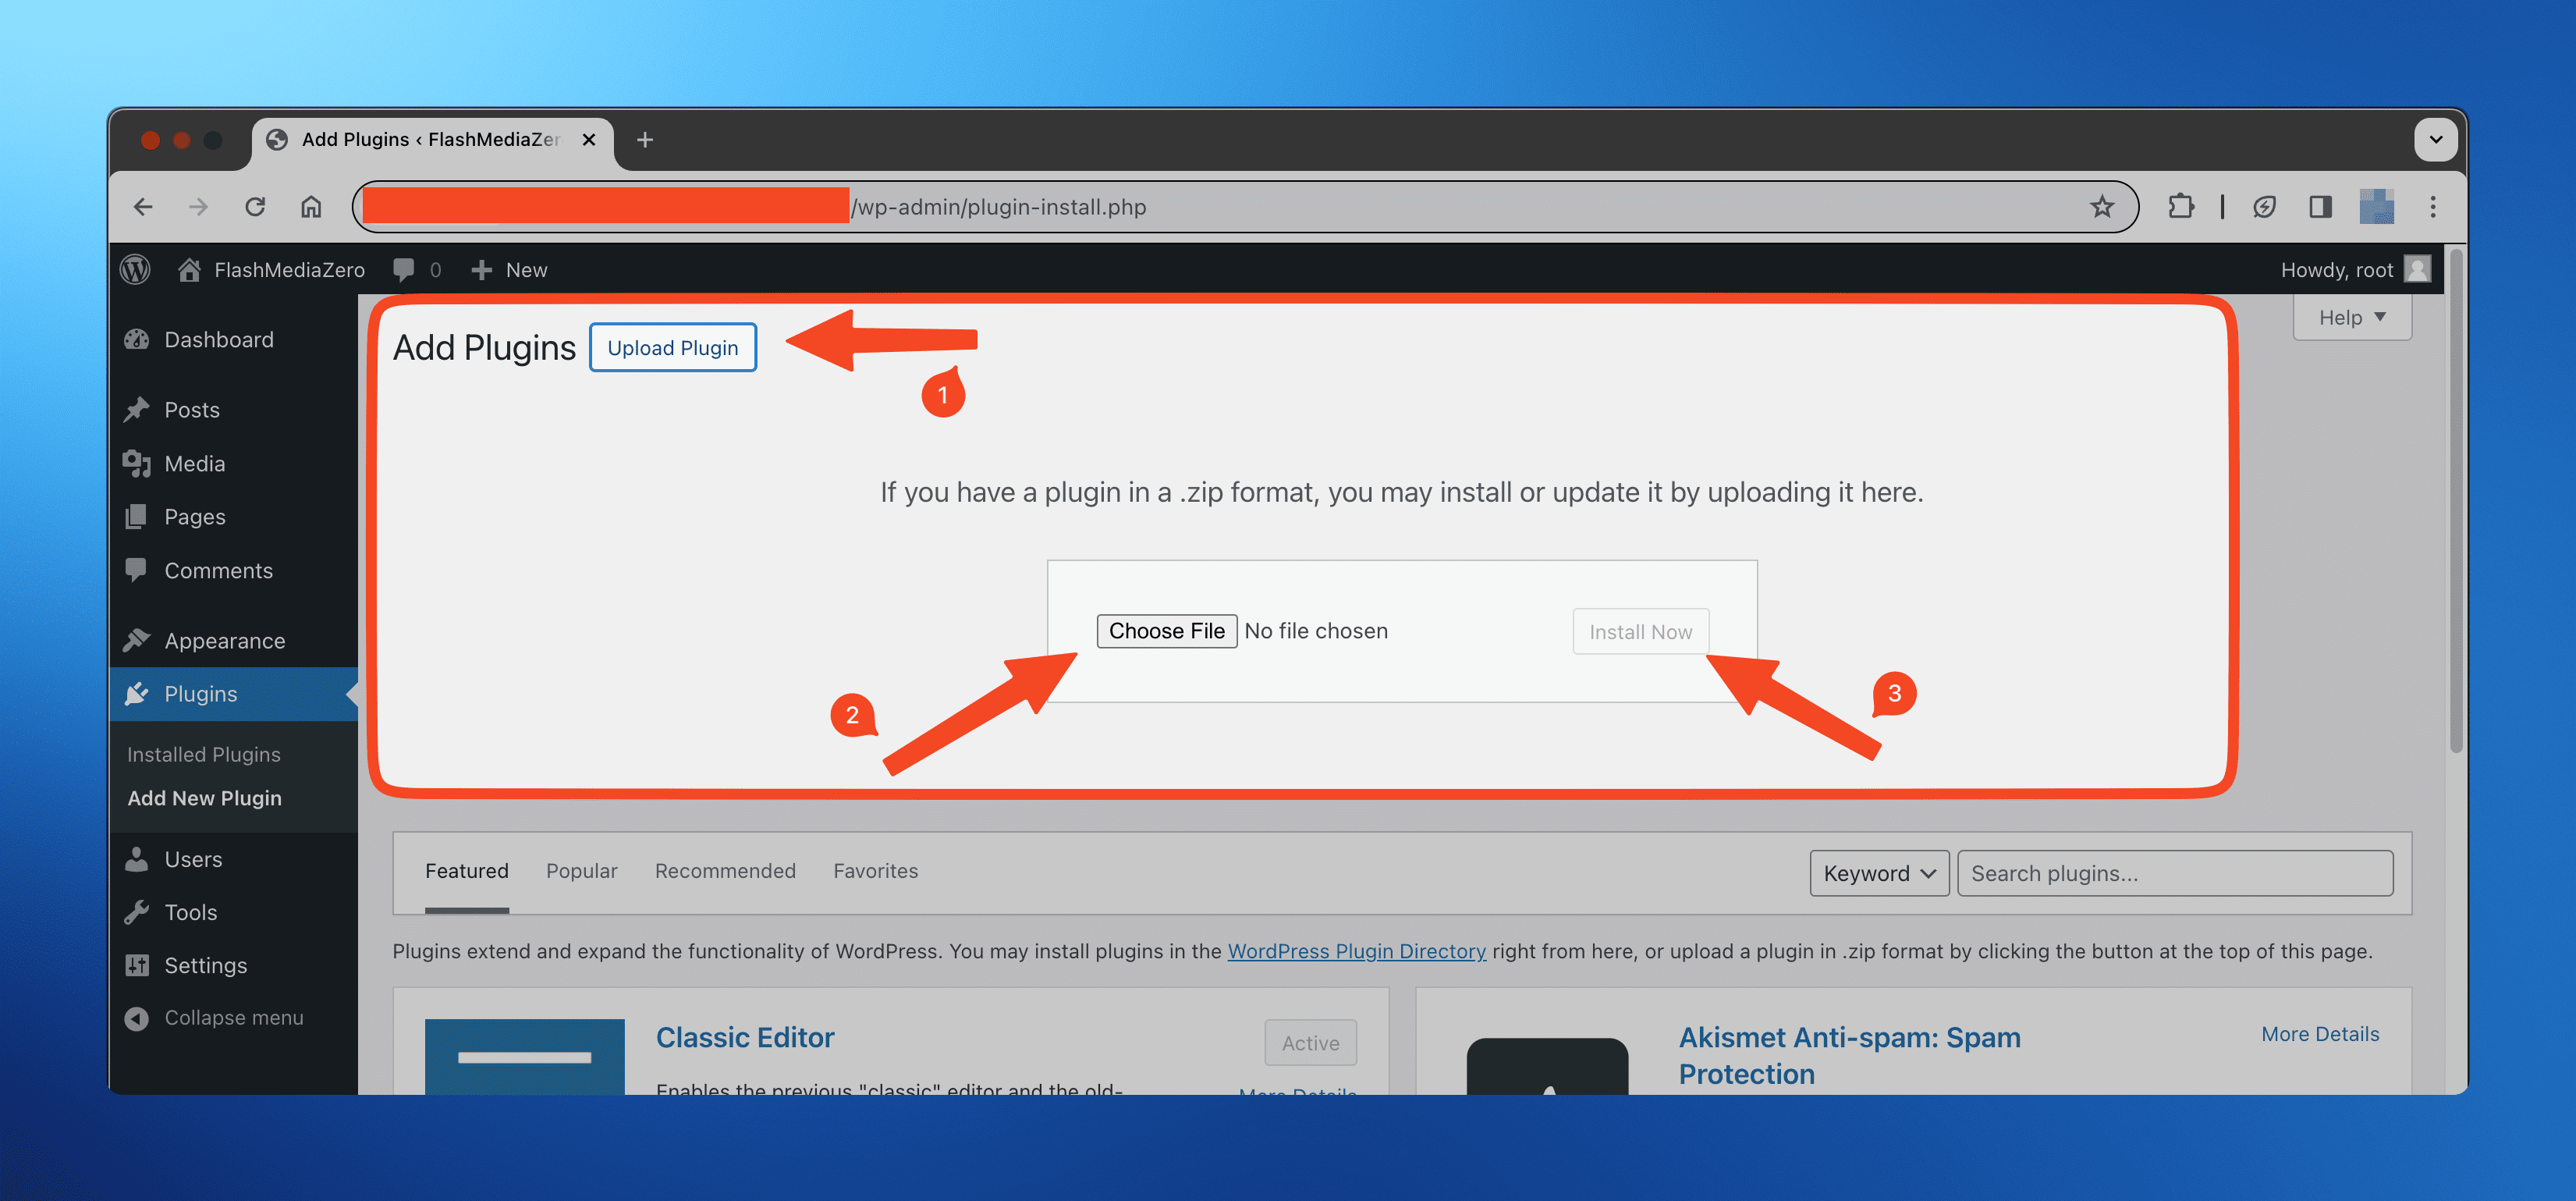
- Find the "Upload Plugin" button towards the top section of the page, and click on it. Note that this button may be called just "Upload" on some versions of WordPress.
- A file selector should appear. Select the plugin file you downloaded in step 1.
- Click on the Install Now button, if present.
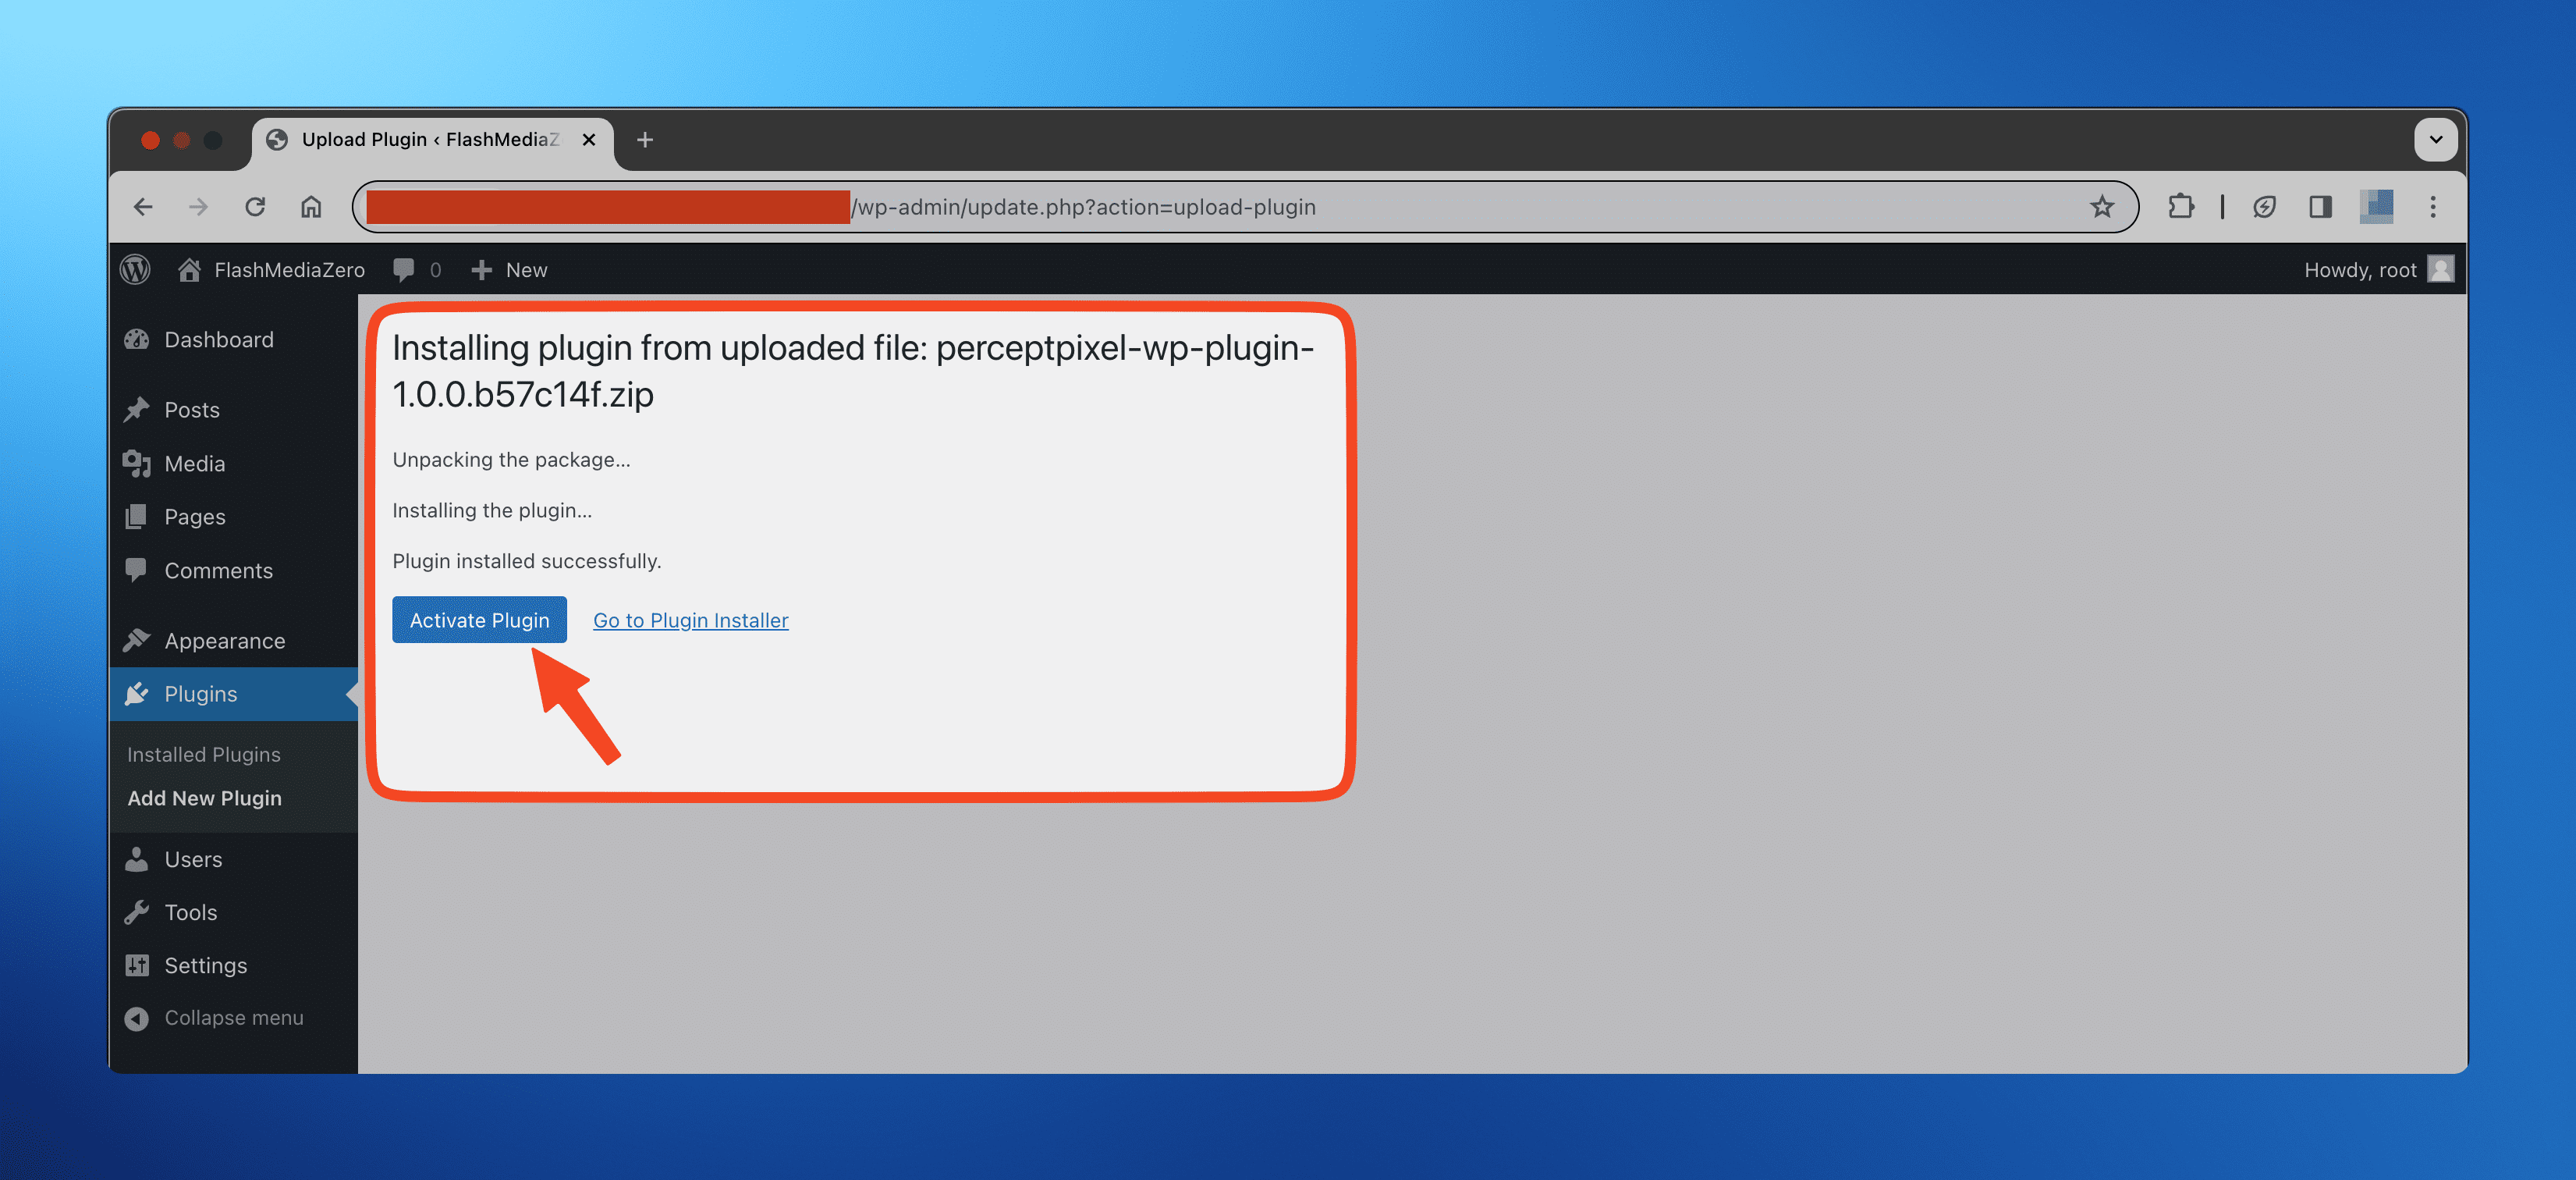
- Once the plugin is installed, click on the Activate Plugin button.
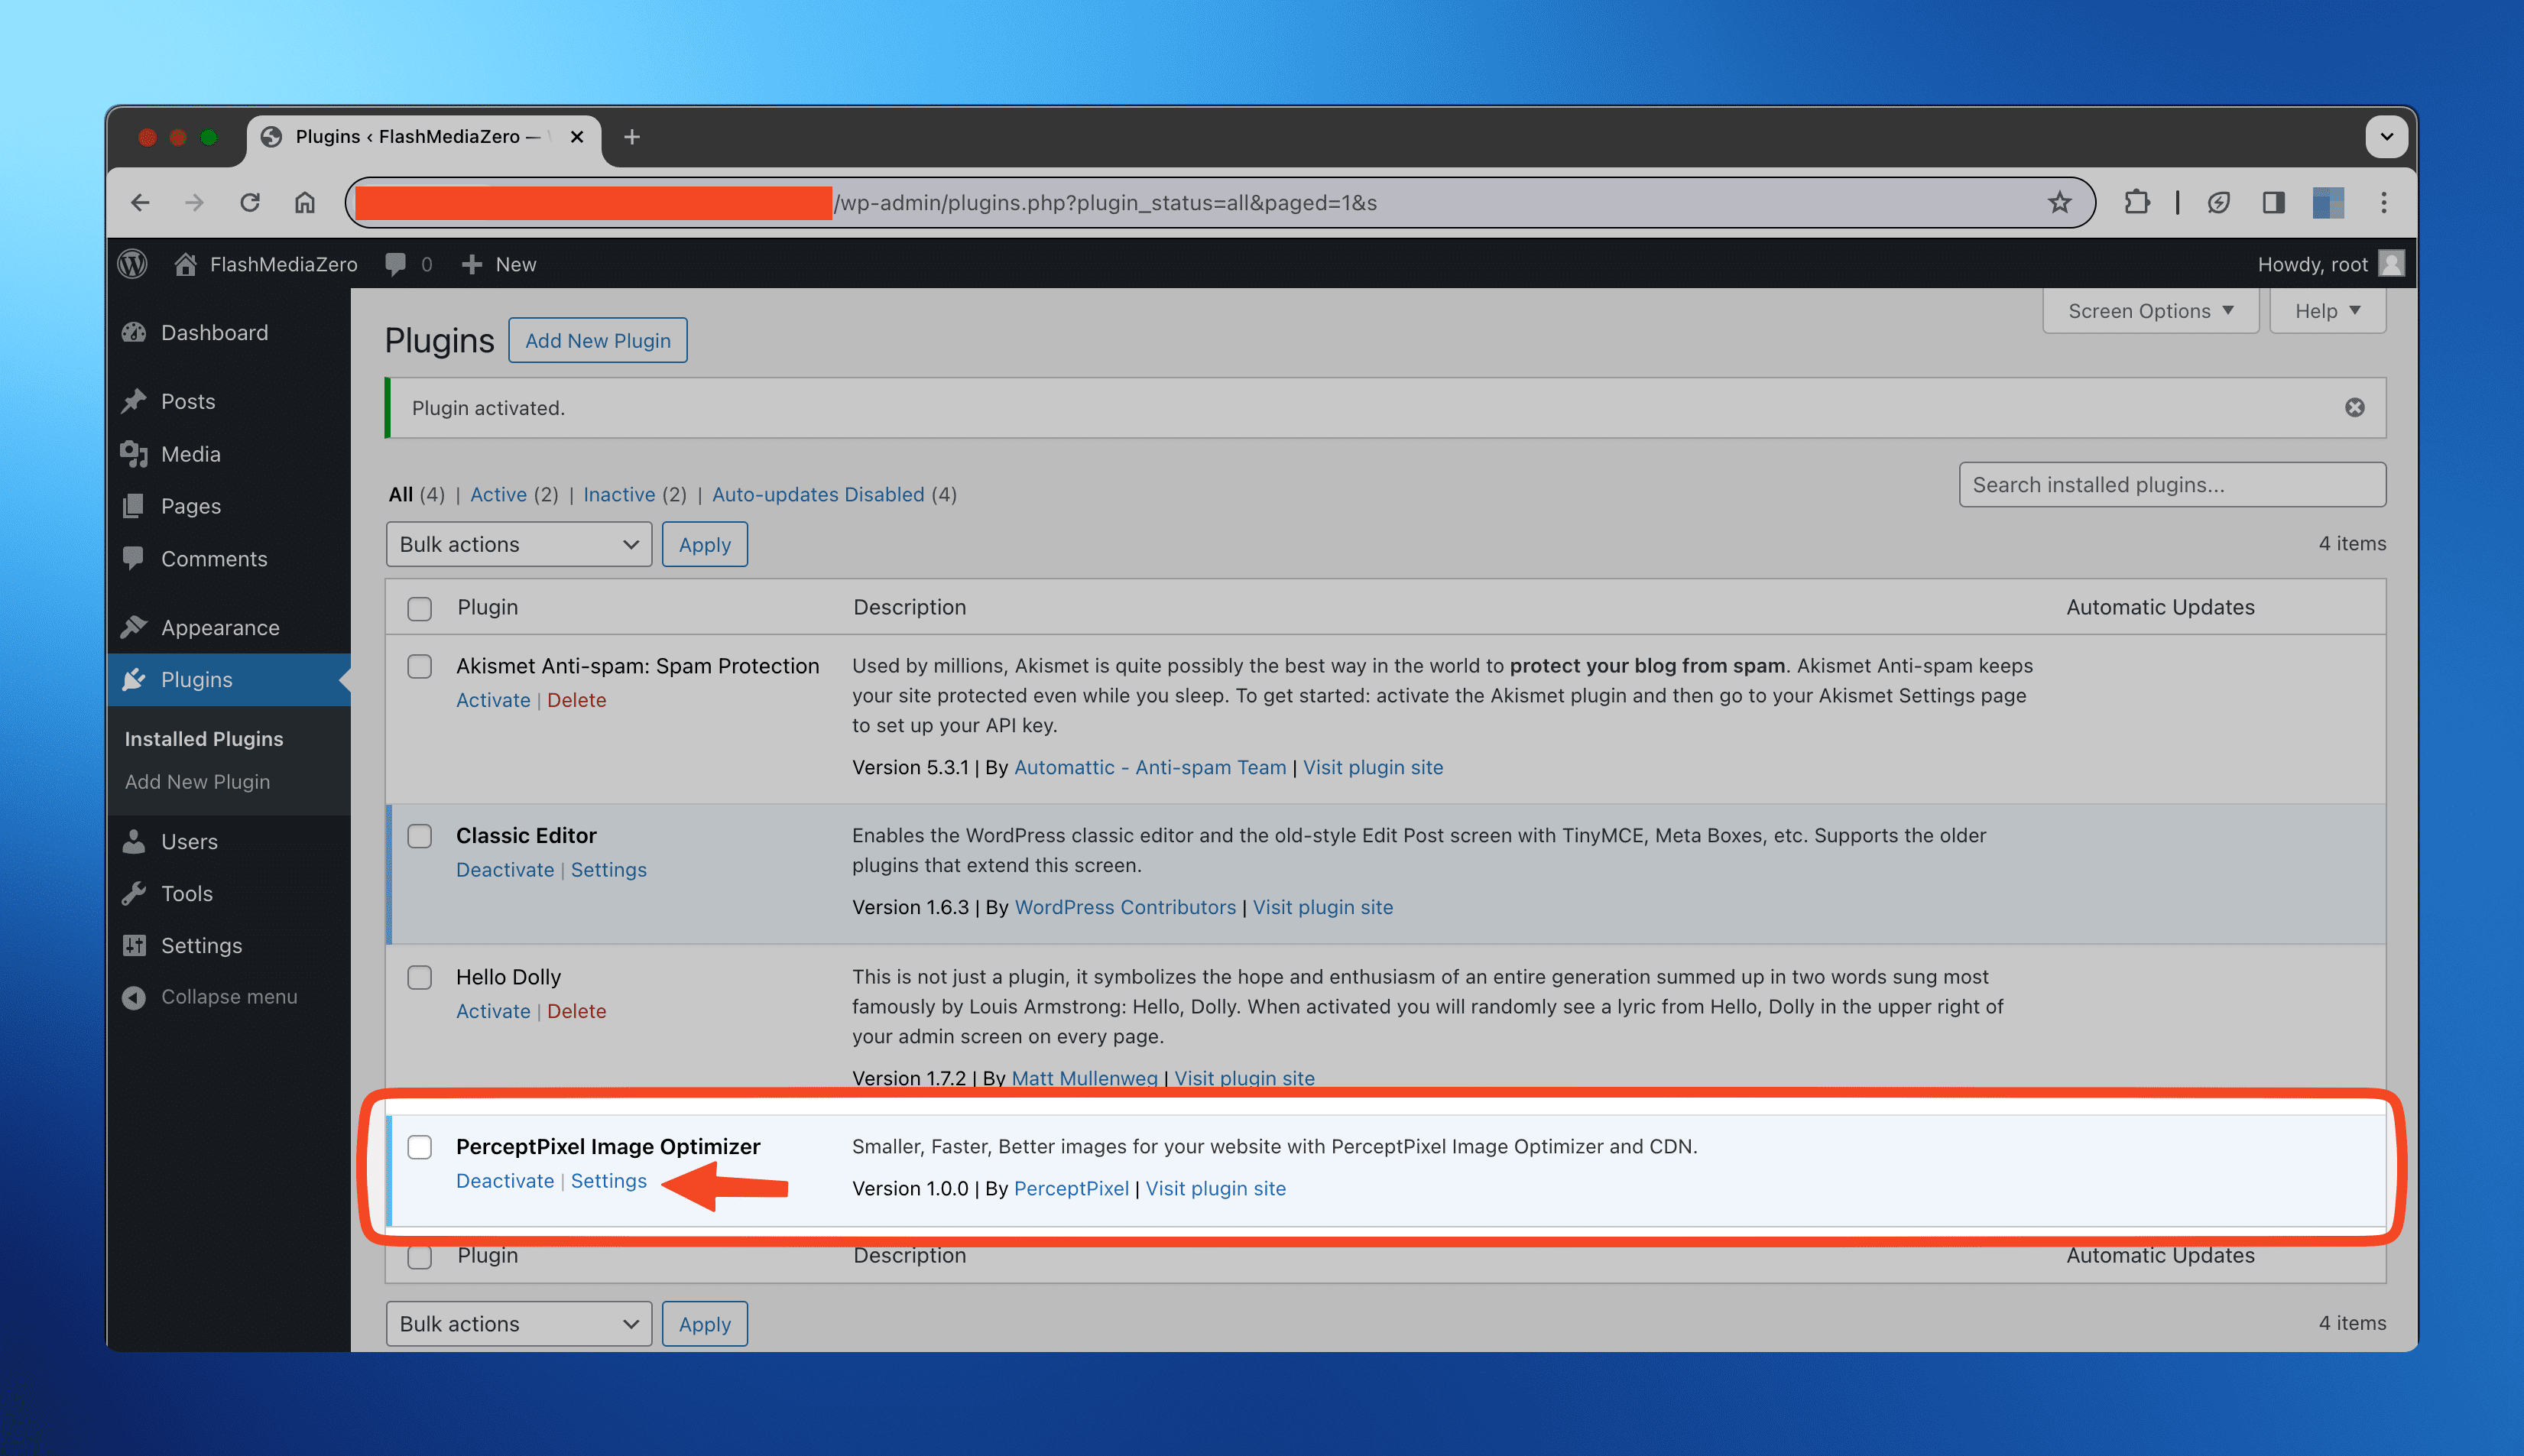
- If things have gone well, you will see the "PerceptPixel Image Optimizer" plugin in the list of installed plugins. Hit "Settings" and proceed to Plugin Setup.
Upgrading
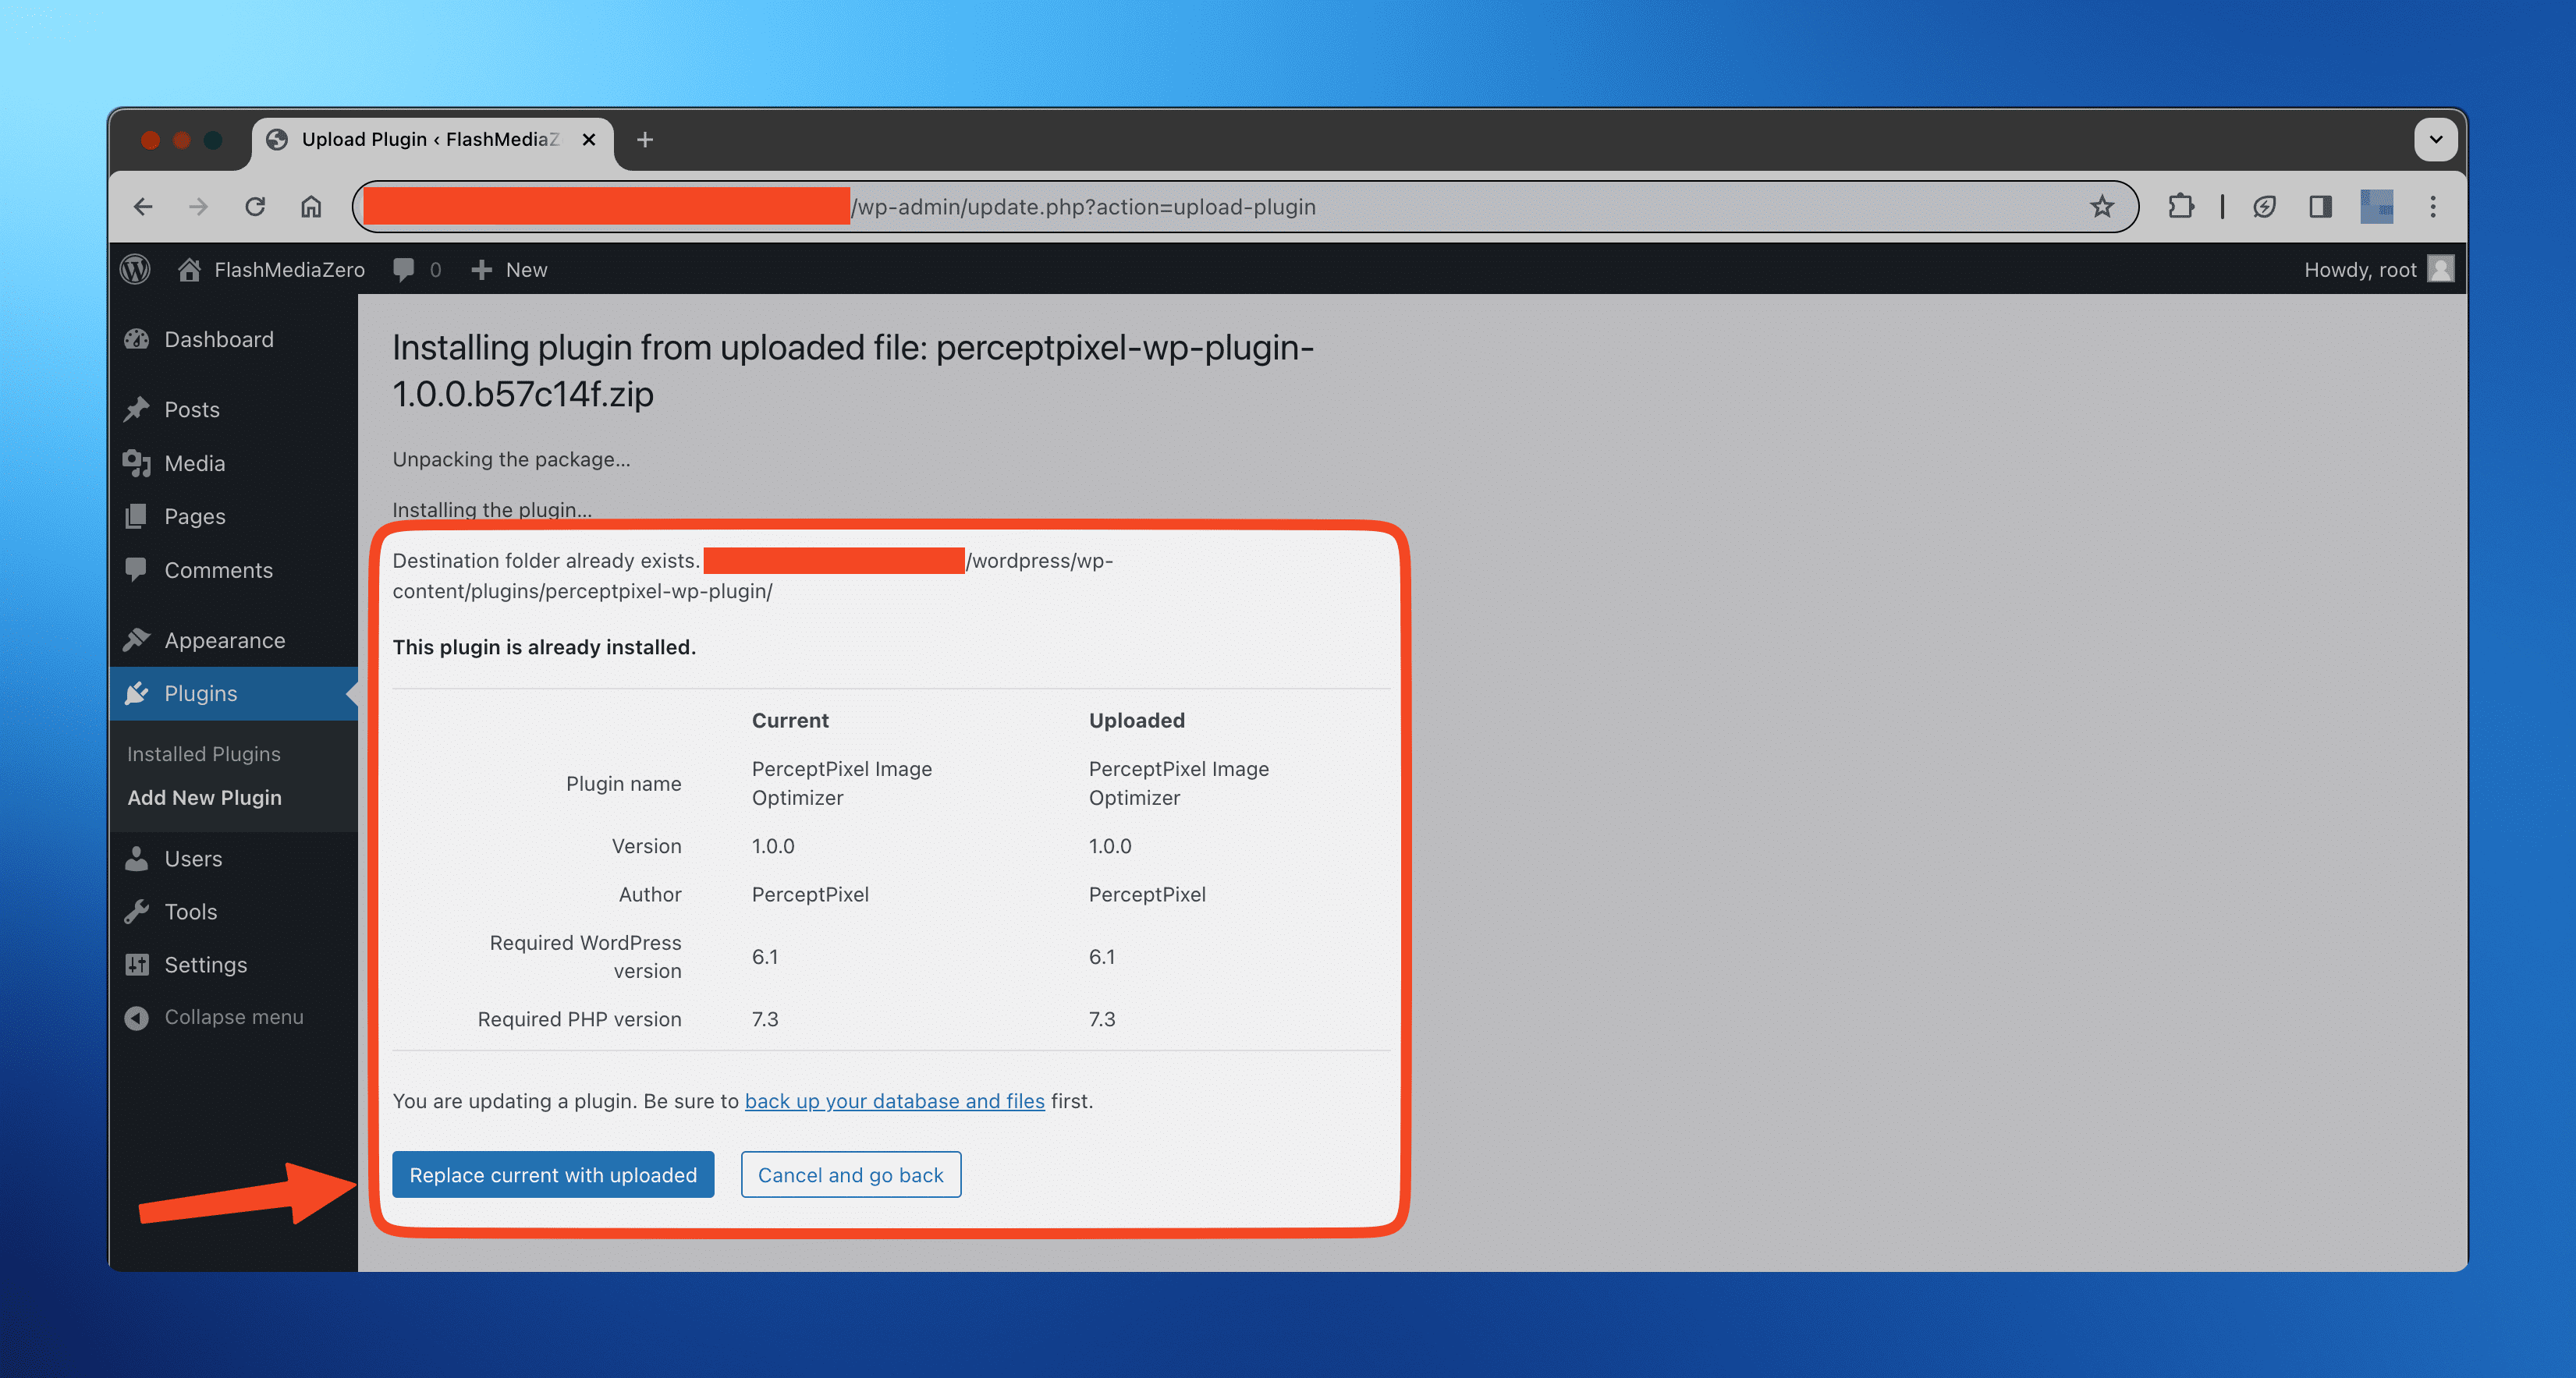
To upgrade the plugin, follow the same steps above. On Step 6, you will see a message that says "Destination folder already exists."
This means that the plugin is already installed, and you are trying to install it again. Here, you should click on the "Replace current with uploaded" button to upgrade the plugin.
Older Versions
You may find older versions of the plugin listed below:
Changelog
1.0.1
- add client-side validation and refresh, for when server-side curl is misbehaving

1.0.0
- initial release